Easy DIY planked table top completed in under 8 hours including a trip or two to Lowes!
This dining room has undergone quite a few changes.
We used to have a thrift store crystal chandelier in here that you can see here,
Blue walls that were perfect for my beachy tablescape here and
I have moved the chalkboard around in this room multiple times and recently painted one of them gold.
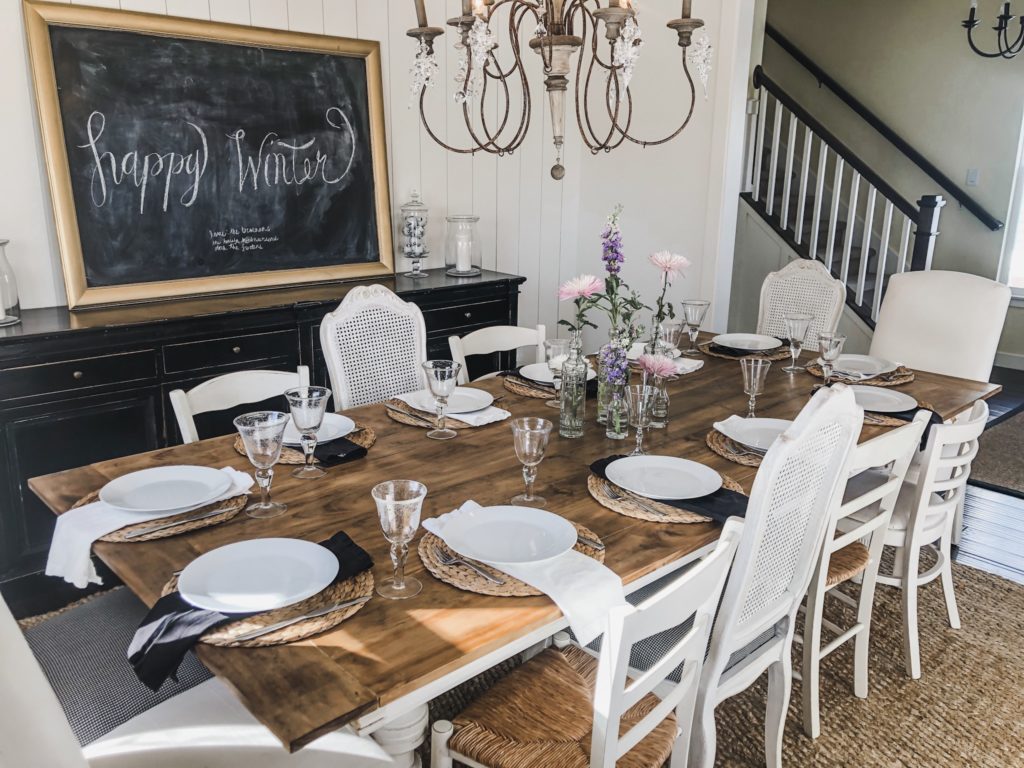
Now I love love love this dining room painted white and with the addition of this planked top table, it’s perfect!
How this table started
We have had this antique table in my family for many years, but it just wasn’t large enough for our large Sunday dinners.
I asked my hubby if he thought he could enlarge a bit for me. He and my son in law did it!
Easy DIY Planked Table Top directions
Building the table top
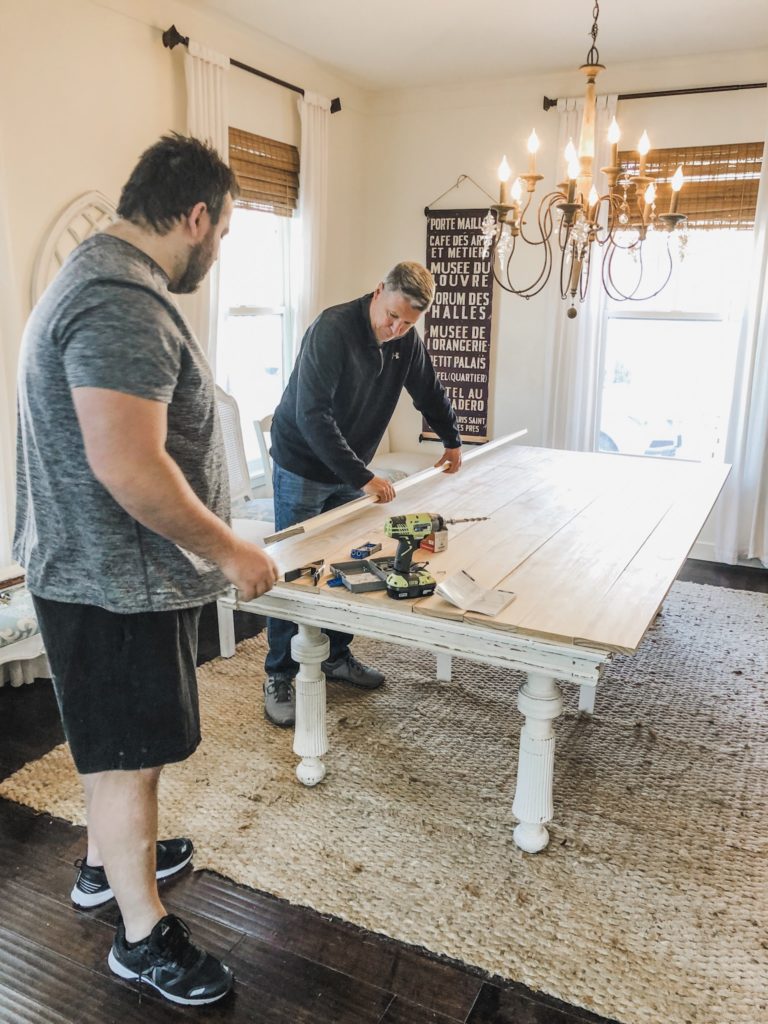
Our table originally measured 8 feet by 45 inches and I wanted it to be 9 feet by 48 inches.
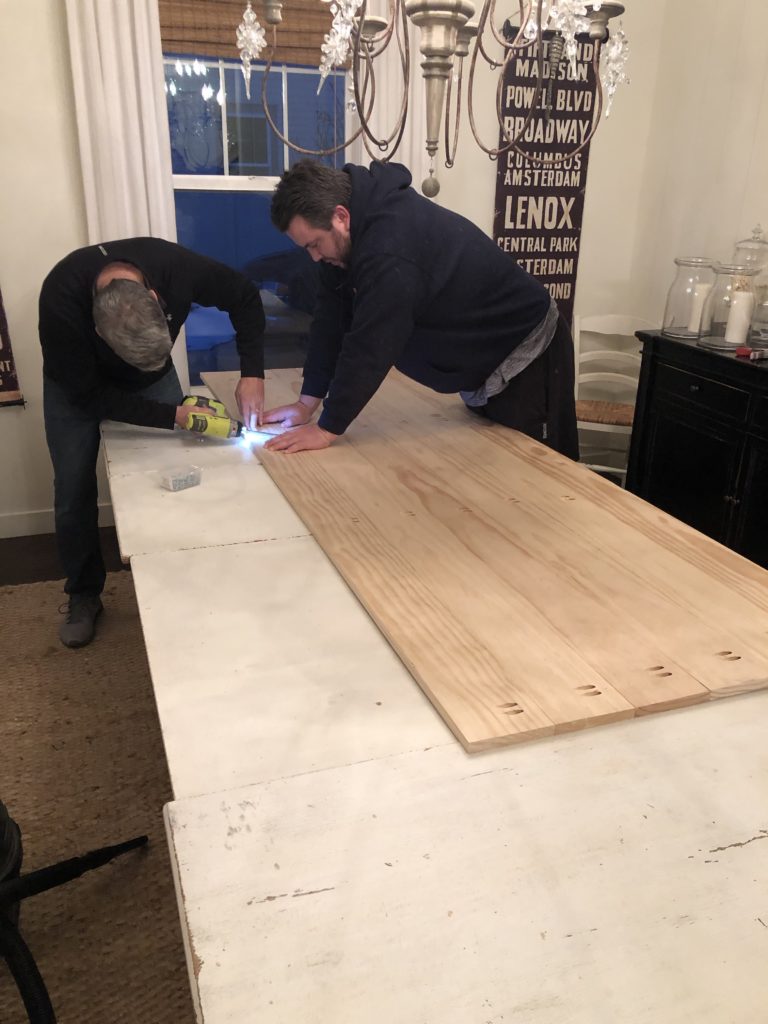
Mike and Kevin figured out they could achieve this by using 9- 8 foot premium pine planks and two more planks cut to the width of the table to cap the ends.
They used a Kreg pocket hole jig that allowed them to drill holes at perfect angles to tie all the boards together perfectly.
This is a must have tool to create a planked table top.
Once the top was finished they flipped it over and screwed the entire piece to the existing top.
Staining the table
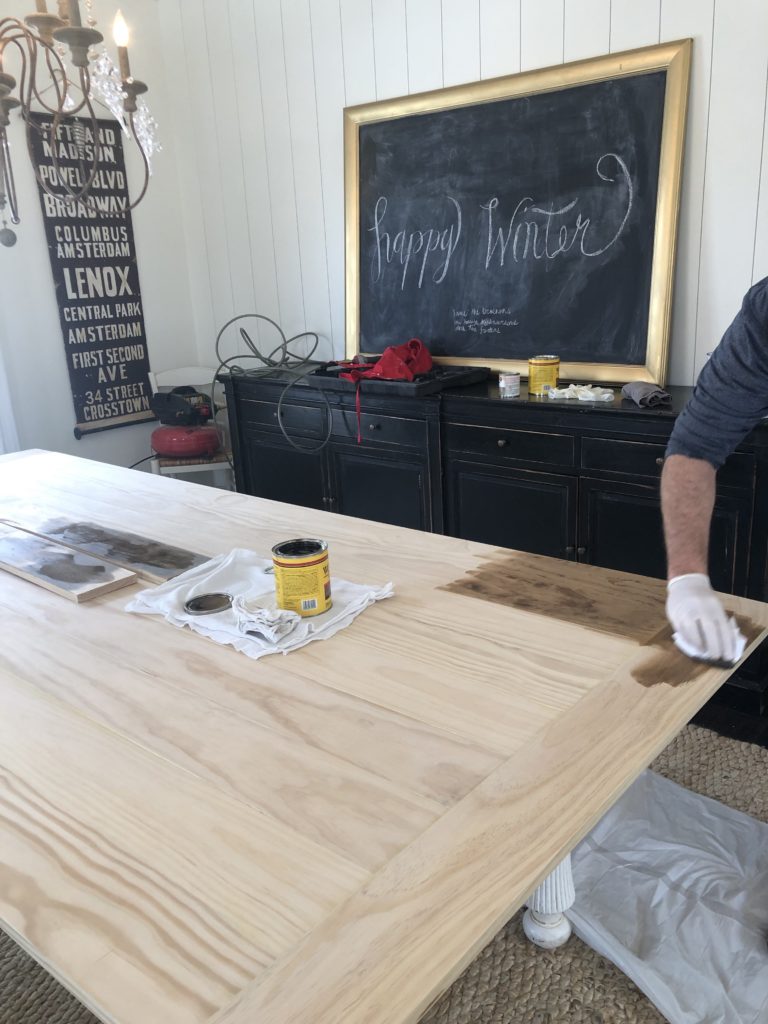
Mike used Minwax Wood finish color- Provincial 211 and used a rag to apply it.
Apply it going along with the grain.
It only needed one coat and we love the color!
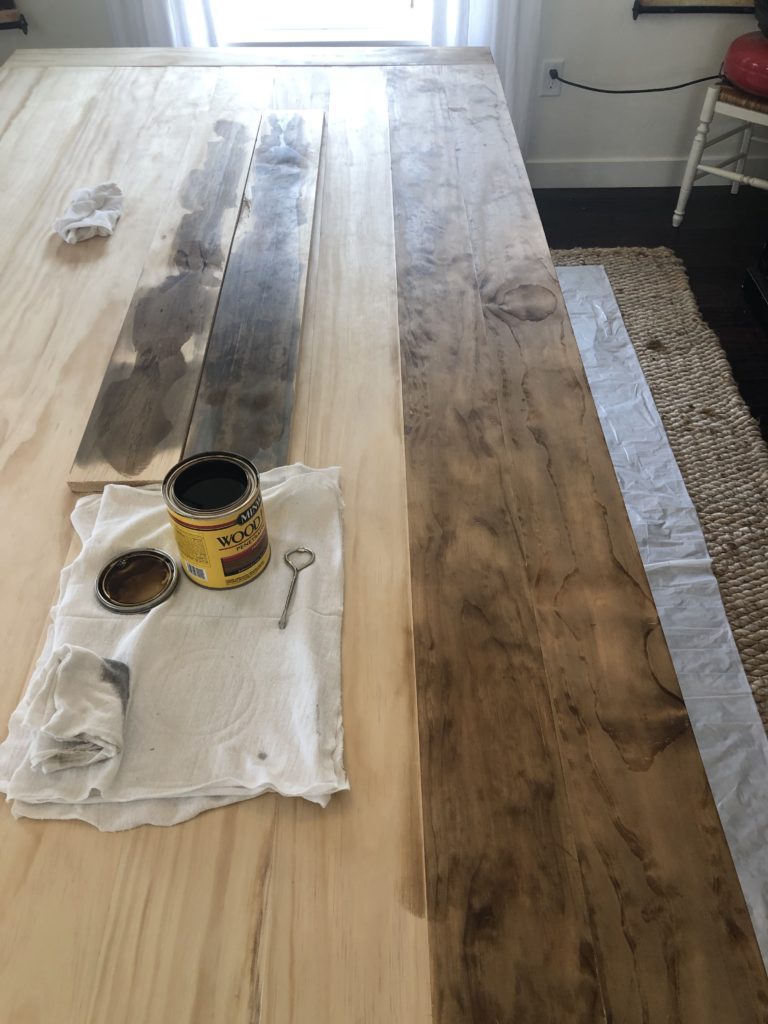
We realized after he stained it that the wood is soft and we should have used a wood hardener product.
Since the Farmhouse look can have that roughed up look, that is what we will go for as the table will show dents and scratches.
The Finished look
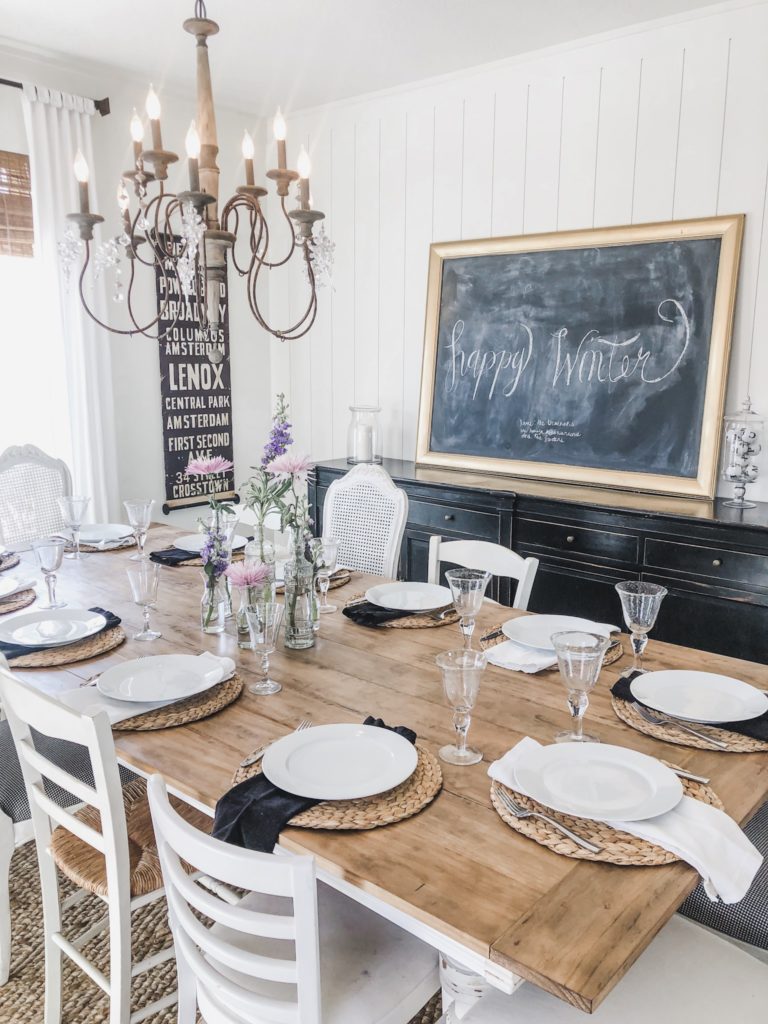
We could not be happier with how this table has turned out!
There is just something so cool about saving this old table just by adding a new planked top!.
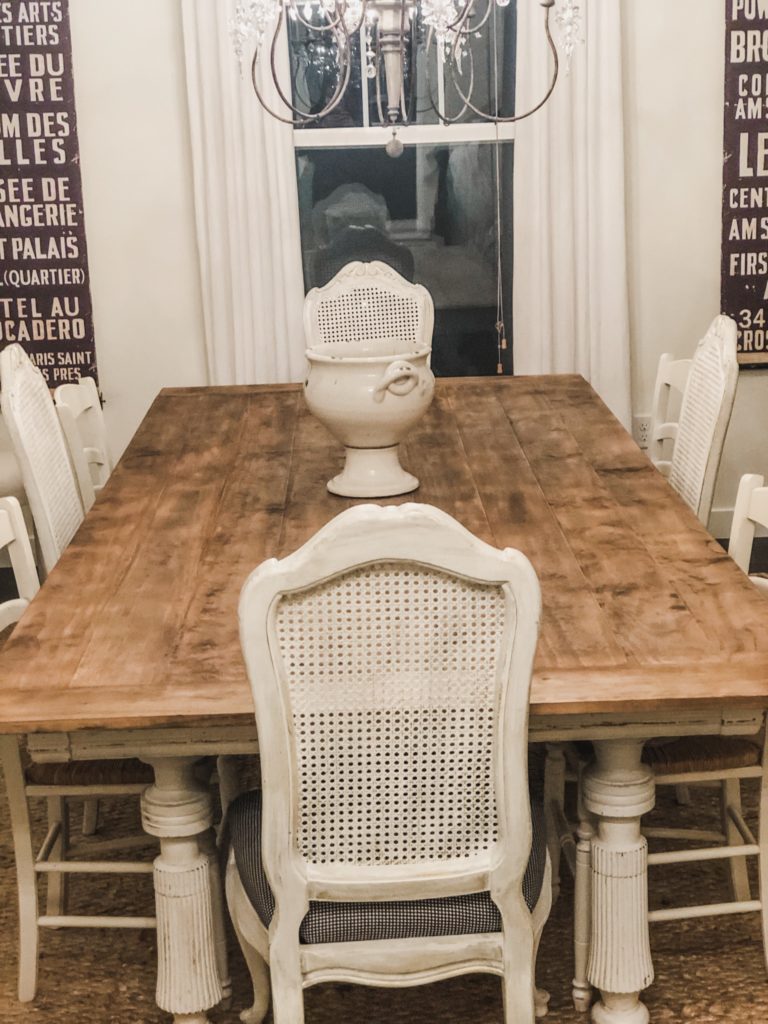
Adding the stain brought a warmth to the room.
Dining room chairs
After we finished the table I decided to recover my chairs. Here is how these thrift store chairs started 9 years ago!
Here is the post on how to recover the seats to my chairs including a video!
If you want to see how my dining room looked before we painted the walls and re-did the table you can see it here
I LOVE THIS ROOM, TABLE AND CHANDELIER
Other Posts you will love
Chalk painted bathroom cabinets
Adding board and batten to entry
Shop this post
Pin for later

Karin- I love that you were able to keep a family heirloom to accommodate your current needs, it is a beautiful table. I am crushing on your chalkboard too, the perfect size to fill the space. Thank you so much for sharing your inspiration with Whimsy Home Wednesday.
Cara,
I was thrilled to be able to keep the table in the family and it turned out better than I hoped. The chalkboard was a thrift find and it is so fun to use for all our get togethers. Thank you so much for your sweet compliments.
Hugs,
Karin
Karin, I loved your table and dining room! I will be featuring it tomorrow on Whimsy Home Wednesday. Thank you so much for sharing your dining room table with us, I just love it!
Thank you soooo much Cara! I really appreciate it!
Hugs,
Karin
Hey hun! This table looks so beautiful! I am glad you were able to keep it! How have those painted cane chairs held up? I have heard the cane cracks easily once it is painted, have you had any issues and how long have they held up if not? I love cane chairs but especially when they’re painted white 🥰
Hi Haylie,
The chairs have held up perfectly no cracking or any issues at all. Thank you for stopping by and leaving a nice comment. I hope you can find some similar chairs.
Hugs,
Karin
This looks so good! Thank you for sharing!
What a great way to make a table larger, and the stain is beautiful!
Thank you Cheryl for stopping by! We really have loved how it turned out! 😊
Beautiful work! It looks fantastic!
Thank you!! We love it!!
How wonderful! I’m glad it worked so nicely for you.
Be blessed,
Laura Lane
Harvest Lane Cottage
Wow! As someone whose children has done quite a number on their table over the years, this is an amazing idea! I could totally do this and it would be WAY cheaper than buying a new table. TFS!
Hi Karin! I love the way your DIY planked tabletop turned out! I never would’ve guessed you had added the top. It looks just perfect in your dining area. Thanks for sharing it with us at Tuesday Turn About!
Thanks so much Crissy! I just love how it turned out! I am so grateful for my hubby and son in law and how they figured out how to do this! Thanks for stopping by and saying Hi!
Karin
This table looks fantastic! What a good way to bring a great table back to life!
Thank you Sarah! I really just love it so much! I am so happy that we figured out a way to keep the table in the family! 🙂
Clever DYI! I especially like your table settings. Have a good day.
Hi Linda,
Thanks for stopping by! I really love how my table turned out the boys did such a great job! It is now the star of the dining room 🙂
Hugs,
Karin