Karins Kottage

Entertaining * Decorating * Fashion * Travel

  • Contact Us
    • Let’s Collaborate
  • Decorating
    • Tour
      • Coastal Guest Room
      • Dining Room
      • Family Room
      • Front Porch Ideas
      • Kitchen Nook
      • Mud Room Built Ins
      • Shop My Home
    • Crafting
    • DIY
    • Furniture redo
    • Chalk Painting/Painting
    • Organizing
    • Shop My Home
    • Sewing
    • Wall treatments
    • Window treatments
  • Entertaining
    • Baby Showers
    • Birthday Parties
    • Bridal Showers
    • Graduation parties
    • Holidays
      • Christmas
      • Easter
      • 4th of July
      • Halloween
      • Parties
        • Super Bowl Party
        • weddings
      • Thanksgiving
      • Valentines
    • Outdoor Entertaining
    • Tablescapes
  • Fashion
  • Recipes
    • Breads
    • Desserts
    • Main dishes
    • Pasta
    • Recipes
    • Salads
    • Side Dishes
    • Soups
  • Travel
    • Cancun in March
    • Traveling through Italy
    • My Travels to Hong Kong
    • Italy
    • Rogers Gardens- Newport Beach California
Home » Easy Roman Shade Tutorial- Using Old IKEA shade

in Decorating· Window treatments

Easy Roman Shade Tutorial- Using Old IKEA shade

 Roman shade tutorial-using old Ikea shade-Karins Kottage
While visiting my sister last week we decided to give her family room/eating area a makeover using little to no money of course!
 
 I can’t wait to show you all the fun things we did!!
 

Easy Roman Shade Tutorial Using an Old Ikea Roman Shade

We started the make over by making an Easy Roman Shade and here is the tutorial
 
 
before- white roman Ikea shades

This is the before… Old white IKEA Roman shades that Tiff had for years! We were going to make new shades from scratch using her new fun bright and bold fabric but I figured out a way to use the old shades as the lining and using the old hardware 

CHA CHING!  FREE! and  LESS WORK!  

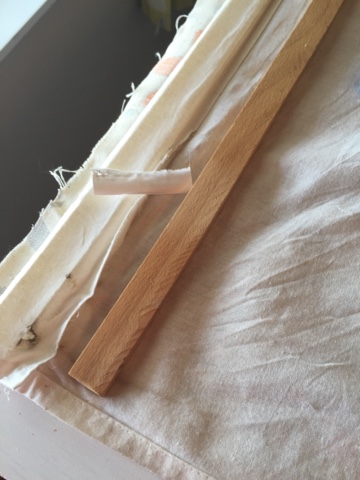
Step 1- Removing old hardware

Remove old hardware: Take apart the top of the old shade by unscrewing the eye hooks and removing wood bar.

 
How to remove old hardware and fabric from Ikea roman shade

Step 2- Layout New Fabric

 Layout desired fabric pretty side face down. Lay the old shade on top of pretty fabric with cords and hardware side facing up. 

 
Easy Roman shade tutorial-using old Ikea shade-
Note: I just used scotch tape to tape the eye screws to the old shade and left the strings in place. Slide the cording out of the eye screws otherwise the strings twist all up when you screw them back into place.
 

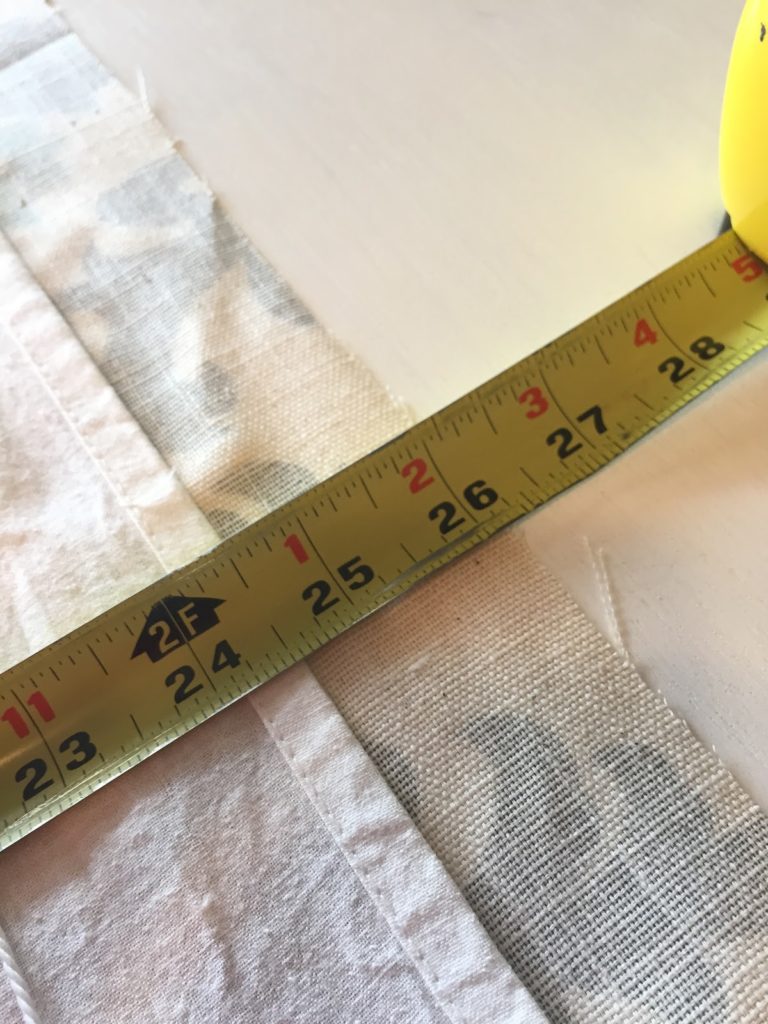
Step 3 Cutting the Fabric 

Cutting Fabric: We cut the fabric to allow for turned in sides and a large hem. Cutting the fabric about 26″ wide and 76″ long gave us enough fabric to create a pocket for the wooden bar and roll up and plenty for a nice large hem.

(Adding more length because the original shades were a bit too short after Tiff had washed them)

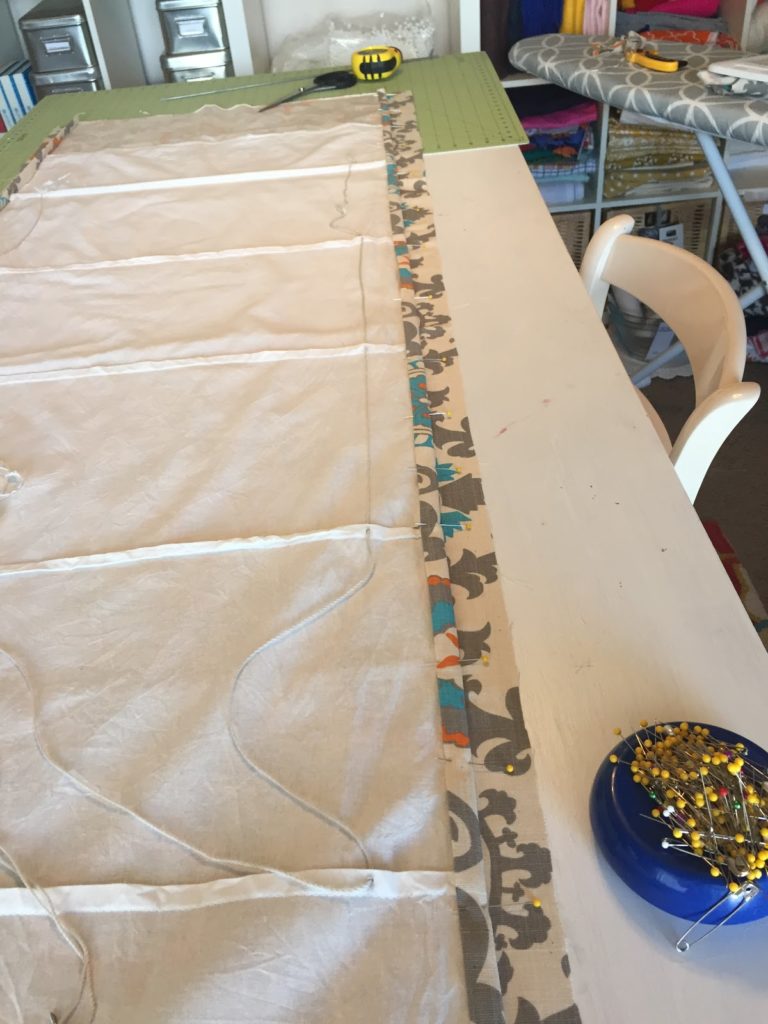
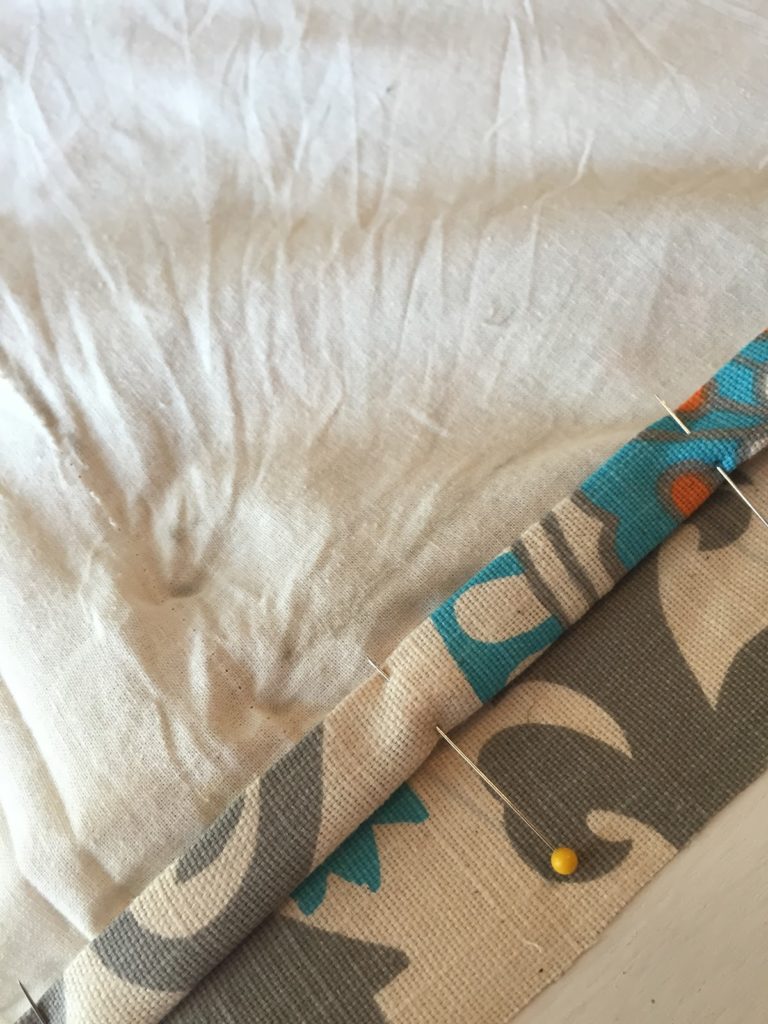
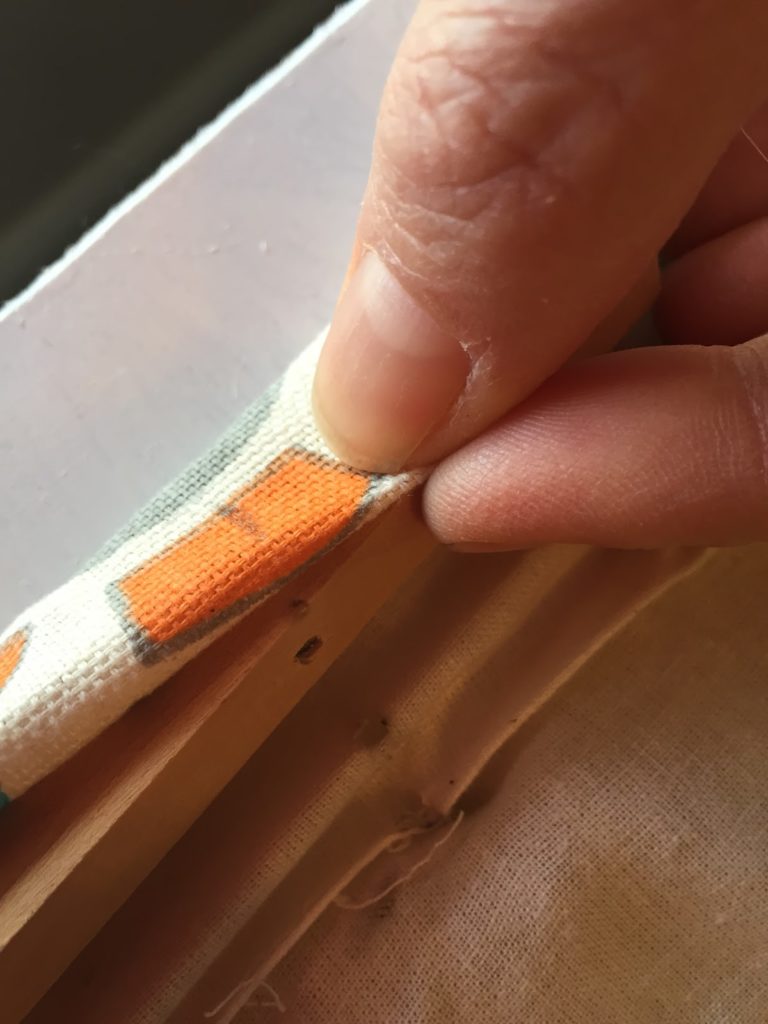
Step 4- Making nice edges for our Easy Roman Shade

The sides: We wanted to have nicely finished looking sides so we folded the pretty side of fabric over the old romans shade about 1/4″ and then again about 1″ or so to meet the inside edges of the old shade.
Iron and pin them all the way down. Then sew all the way down on each side.
 (in the photo on the left, the top fabric shade is sitting on top of the other cut fabric for the second shade)
  

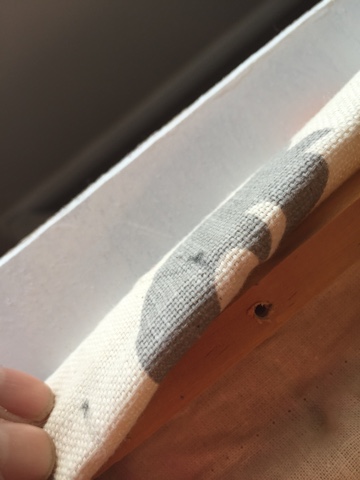
Step 5 -The top of the Roman Shade Pocket

 To create the top of the Roman shade pocket first you need to made a small 1/4″ hem. Take both the pretty fabric and the old roman shade fabric and fold under 1/4″ hem. Iron until smooth. Place old wooden bar on the fabric and roll up and over the wooden bar.

(This is how to get the correct measurement for a pocket)

 Remove the wood bar, pin in place and sew across the entire shade to create a pocket for the wooden stick to slide in. Note: Mark on your fabric where the holes are in the wooden bar so you can replace the eye screws once the fabric has been sewed.


If you forget to mark the spots you can kind of feel around for the holes with your fingers and stick the eye screw back in and twist tightly.

**** MAKE SURE you put the wooden bar side with multiple holes on the side where you want all the the cords to gather to pull the shade up and and down.  We chose to bring all the cords to the right side for both shades. 

 
Easy roman shade tutorial for top of shade


Step 6- Creating The Hem For the Easy Roman Shade

Tiff wanted her Roman shades to hang a lot longer than the old ones so we made sure the hem would be nice and long. When we originally cut the fabric we made sure we would have enough to turn the fabric under 1/4″ on the edge and then fold the fabric up 4″ until it met the end of the old shade. Pin and stitch in place.


Easy Roman shade tutorial-using old Ikea shade-The Style Sisters


Step 7- Replace Eye Screws and Thread Cords

Screw in the eye screws and re-thread the cords and you are done!!

Or so we thought but when we tried to pull the cords to get it to fold up we noticed it was heavier than it was originally so Tiff added a third cord and another eye screw to the center.

 Use a very large needle and some cording…stitch it up through the center using the same areas as the old cording..it took maybe a minute to do this. 

 
Easy Roman shade tutorial-using old Ikea shade-The Style Sisters
 
To help the shade learn where it was supposed to fold…we pulled up the strings and ironed the folds.
Easy Roman shade tutorial-using old Ikea shade-Making pleats

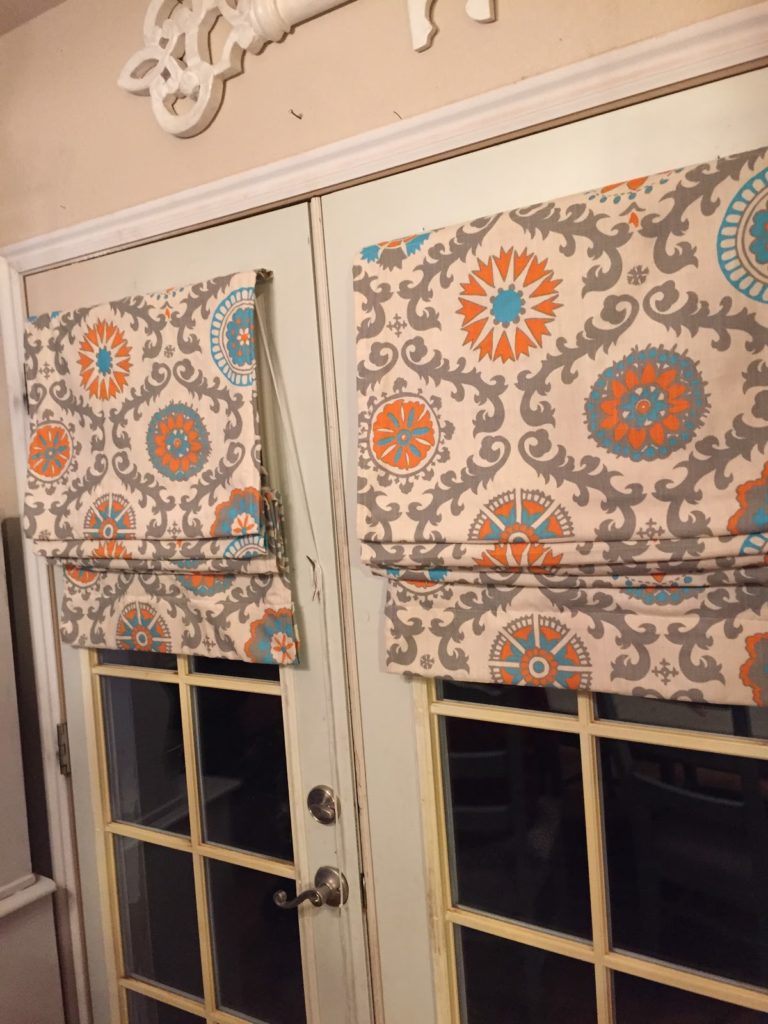
We bought small “L” shaped hooks to attach it to the door 

TA DA!!! So dang cute!!

Easy Roman shade tutorial-using old Ikea shade-

Tiff is thrilled with her new Roman Shades that cost practically nothing!! 

The Colorado sun has bleached the trim on the doors…we need to paint!


If you have any questions please let me know…it is tricky writing a tutorial so I hope it makes sense.
 
Karin 🙂
 

10 Comments

Stay connected to the Kottage

don't miss a thing
☞  SIGN UP TO receive THE LATEST news and updates from Karins Kottage ☜
You’ve successfully signed up! Check your email for details.
Previous Post: « Sea Shell Mirror Tutorial
Next Post: Fashion Friday- Navy jacket and pop of orange »

Reader Interactions

Comments

  1. Deb Farrar says

    May 23, 2024 at 9:58 am

    Hi, I am doing the same with my Roman blinds, one question I have is did you stitch the rod pockets for each pleat to the new material? Or, is this why you ironed it?

    Many thanks

    Deb

    Reply
    • Karins Kottage says

      May 23, 2024 at 11:37 am

      No I believe ironing it allowed it so fold up just like the original Ikea one does. Ironing allows it to fold up correctly You could do some tiny stitches for each fold if you feel it won’t roll correctly. Hope this helps.

      Reply
  2. Eralyn McLarty says

    February 4, 2022 at 9:11 pm

    Please explain the L hook used in your older post. Can you show a close-up of how it was attached?
    Thanks.

    Reply
    • Karins Kottage says

      February 4, 2022 at 9:20 pm

      Hi Eralyn, Not sure what you mean in my older post? You can email me at karinbob@gmail.com

      Reply
    • Jane Fitzgerald says

      March 7, 2024 at 5:48 am

      L hook is like eye screw but in place of eye is L shape.

      Reply
  3. Kimberly Lewis says

    March 2, 2015 at 8:48 pm

    Beautiful! This looks so amazing. Pinned and tweeted. We love to party with you, so I hope to see you tonight at 7 pm.. Have an amazing day! Lou Lou Girls

    Reply
    • Karen H. says

      June 30, 2024 at 11:19 am

      If the new fabric is washed in warm water, and ironed prior to beginning the project, there should be no shrinking when shade is laundered later.

      Reply
  4. Debra@Common Ground says

    February 28, 2015 at 3:12 pm

    These are just wonderful! love the fabric, thanks so much for linking up to SYS!

    Reply
  5. Maria Brittis says

    February 26, 2015 at 12:43 pm

    Thanks for the invite, I linked up a older post, I hope that was ok, its one of my favorite projects, I love you blog and love the roman shades you made in another post. Hugs Maria

    Reply

Trackbacks

  1. Easy Cornice Tutorial Using Foam Board - Karins Kottage says:
    November 9, 2021 at 11:04 am

    […] Easy roman shade using an old Ikea shade […]

    Reply

Leave a Reply Cancel reply

Your email address will not be published. Required fields are marked *

Recipe Rating


This site uses Akismet to reduce spam. Learn how your comment data is processed.

Primary Sidebar

Search This Blog

Welcome to Karin’s Kottage!

Summer porch

Hi I am Karin! Welcome to my Kottage. I share all things about life here at the Kottage. Cooking, DIY, Crafts and Travel! Learn more about me and my Kottage by clicking on the photo.

Shop My House

Shop My House
  • Contact Us
  • Decorating
  • Entertaining
  • Fashion
  • Recipes
  • Travel

Footer

Looking For Something

Let’s Get Social

  • Email
  • Facebook
  • Instagram
  • Pinterest
  • RSS
  • Twitter
  • YouTube

RSS RSS feed

  • Outdoor DIY Decor Ideas + Coastal Crafts You’ll Love
  • Easy Roasted Vegetable Sandwiches on Ciabatta – A Crowd-Pleasing Favorite!
  • Patriotic Red White Blue Decor + Stylish IKEA Hack
  • Easy & Charming Red, White & Blue Tablescape

Copyright © 2025 · Market theme by Restored 316