A Dining Room Chair Make-Over Tutorial

It has been a year since we moved back to Utah from Texas and it has been a fabulous year filled with many fun changes. We are now closer to our family members and spend lots of time with them!
We changed the look of our interiors and landscaped
the yard in our new home.
Last year before we moved we scoured many thirft shops to find pieces of furniture that might work for us and we came across this table and chair set and knew we had to have it!
Of course it did not look like this to begin with…we had to do a complete Make-over!!
Here is the before…great quality, heavy wood, naaag-a-hide seats…haha that is how I spell it because it needs to be hidden!!
Me no likey plain wood and naag-a-hide! So I had to bring out the big guns! A.K.A. my amazing hubby!
He is so awesome and always helps me with big projects like this!
I see the potential and get the idea and then he does all the hard labor..not too bad huh!!
I love the details on these chairs and they just popped when the paint started going on. He lightly sanded each piece and then slapped the paint on…I can’t remember what color we used….we found the paint at Wal-mart. Then once the paint was on and dried we sanded off some of the edges to make it look worn. You can see the wood showing through on the edges.

Then we sanded in random spots on the flat parts of the chairs too. We then painted on a coat of polyurethane, sanded with an electric sander to make it smooth and painted on another coat of polyurethane. It has been a year now and they have held up so nicely!! Dirt and grime just wipe off easily!

Next came the covering of the Naag-a-hide!! Brown kaka looking stuff! I left it on and just covered it up!

Here I am as Vanna White hahah

Step 1. Remove the seat from the chairs and save the screws somewhere where you can find them again

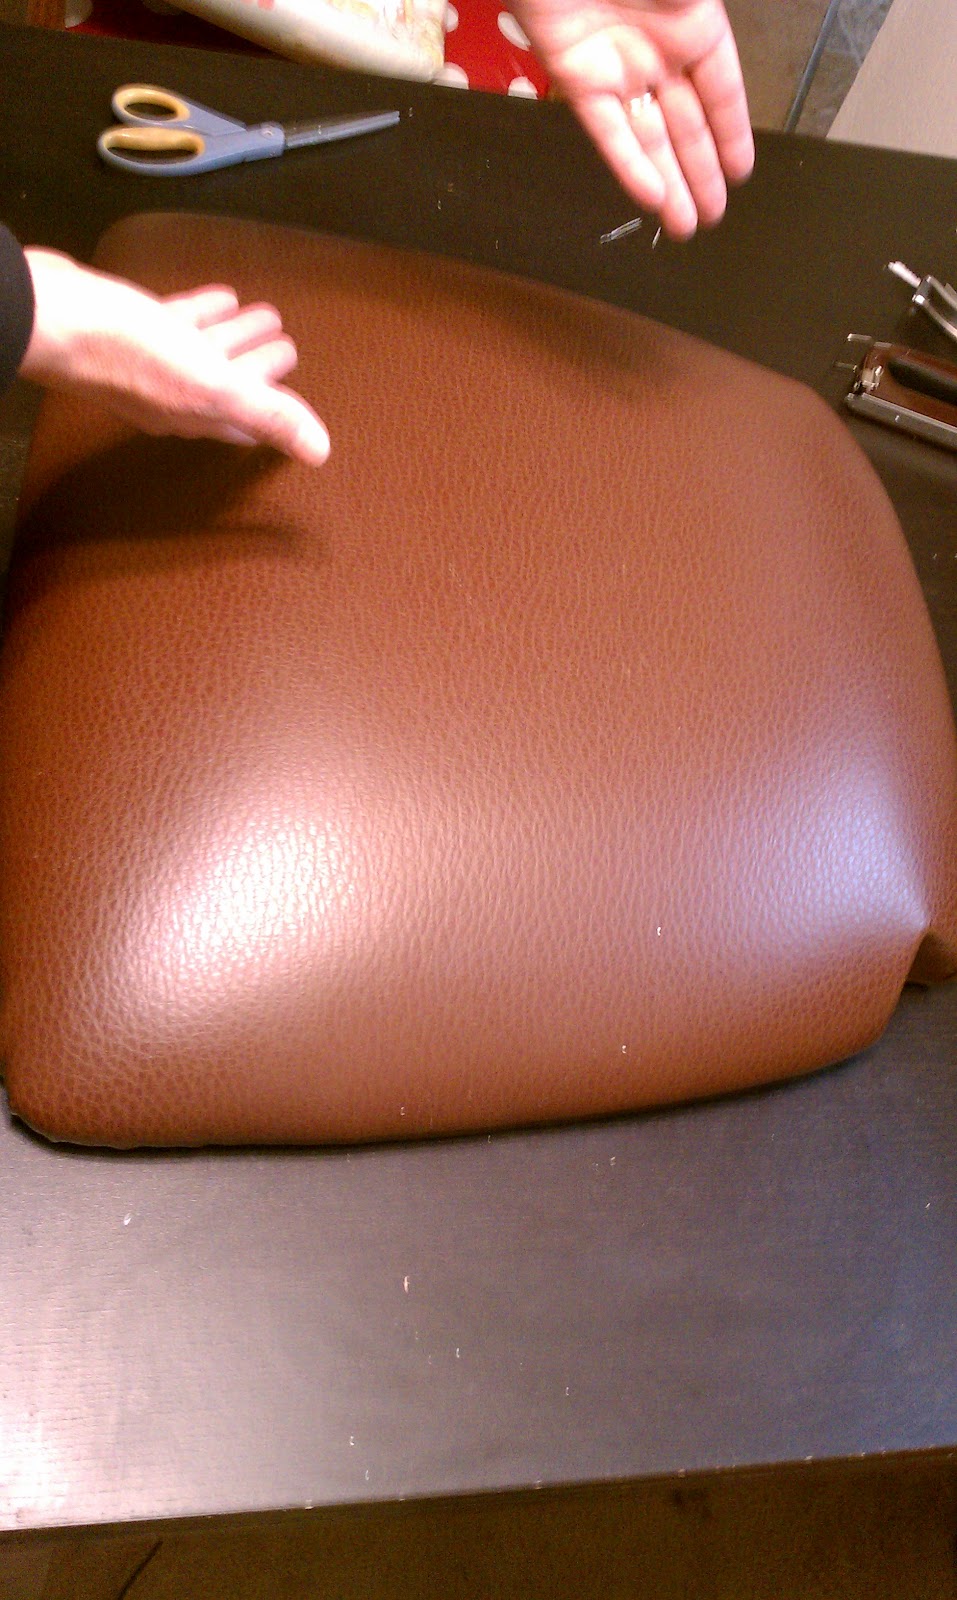
Step 2. Make sure your work surface is large enough to handle your chair seat as you will be flipping it around. Oh and cover your worksurface…I scratched my daughters table (oops)

Step 3 lay your fabric on work surface pretty side face down. Place seat on top with with back facing up and bum sitting area down.Step 4 Starting on one side pull fabric in center and staple 2 or 3 staples. Move to opposite side and repeat. Go to the other opposite sides and repeat. Then work your way all around the piece…pulling and stapling all around. (this allows the fabric to stay centered and not pull to one side) Check to make sure the fabric is centered nicely..if not remove staples and fix….or as my grandson would say “fits it grandma”. Leave corners undone for now…I will show you how to do the corners below.

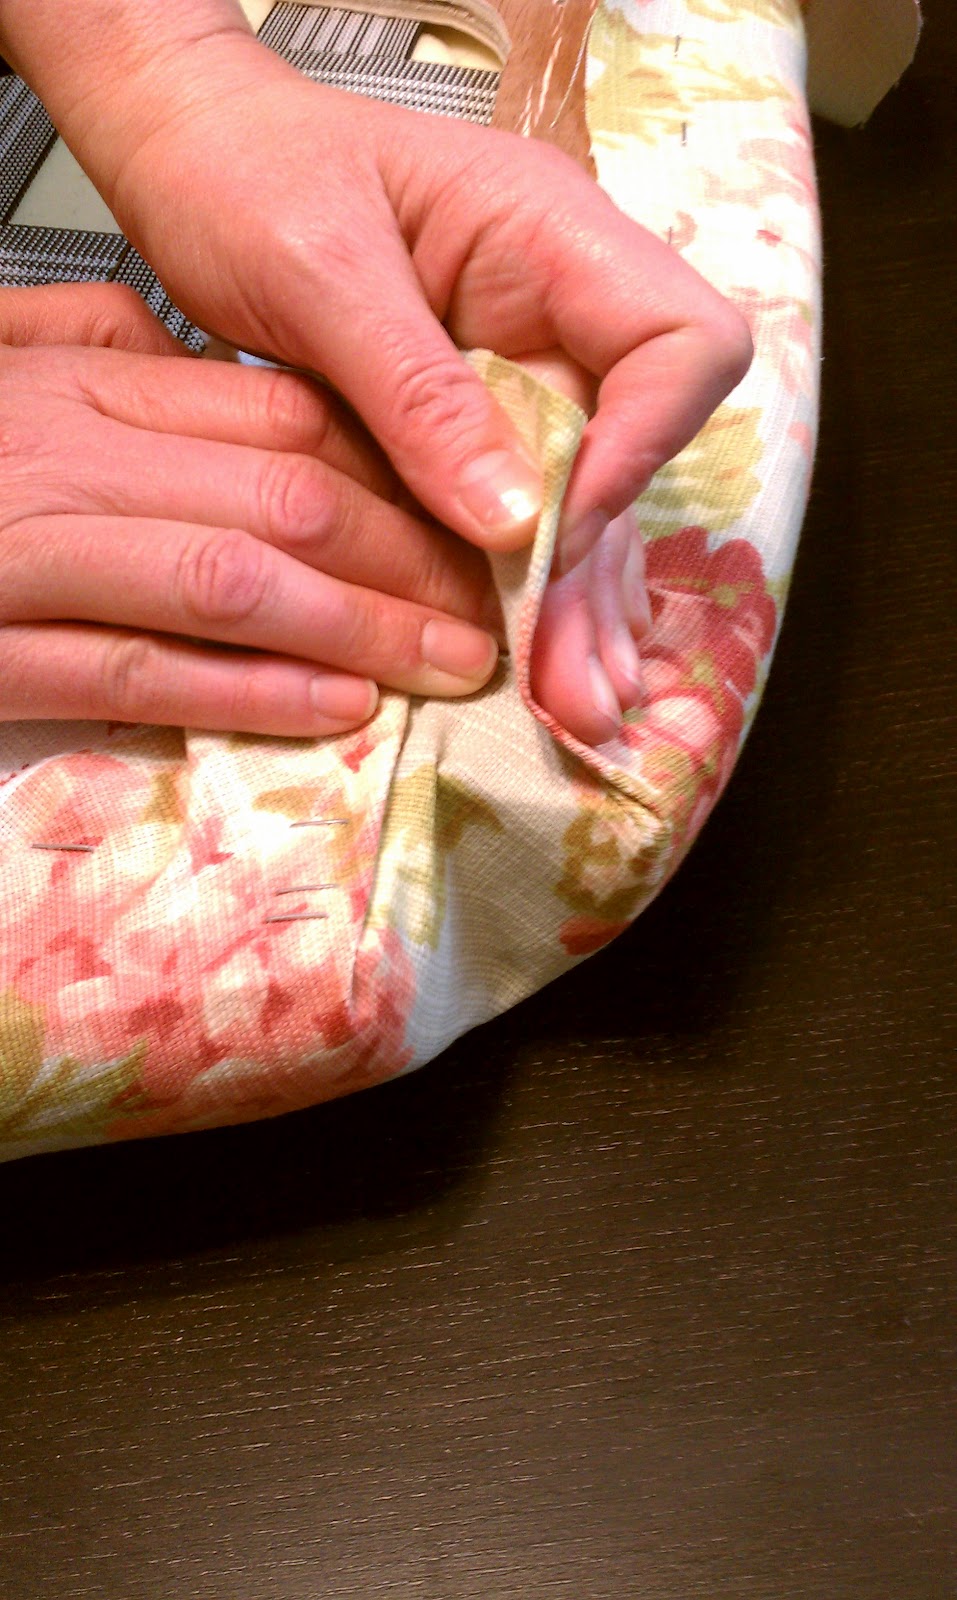
4. Here is the corner area undone…Pull up the center towards the seat…make it nice and smooth…. and then on the two edges fold to make everything nice and smooth.

It may take a little folding here or there to make it lay nice and smooth and then staple, staple staple.
Trim off any excess with your scissors. Oh and for the backing I reused the black stuff that was on the chair and stapled over the edges of the nice fabric for a clean look.
Then flip it over and look at your beautiful new seat cover!!
Here is how they look today! I love these chairs so much!! They are so sturdy, they hold up so well to the grandkids, tons of nieces and nephews, in laws, out laws, friends neighbors and the dog! I sprayed a fabric protector over my new fabric and they are holding up perfectly!!
Here is the table and chairs in my kitchen nook today. I love using a round table…eveyone fits around it for meals, games, computer useage and just chatting and hanging out!
Ta Ta For Now! Enjoy your weekend!
I am participating in
Karin


Karins Kottage

Welcome to Karins Kottage! There is always something fun going on! You would think after becoming an empty nester couple that our nest would be very quiet and empty but our Kottage nest is usually more full than what we started out with! You might find me hosting a birthday party or graduation party and a baby shower on the same weekend or a big outdoor get together with 25 of our friends and family in the backyard or maybe I might be in the kitchen trying out a new recipe for my hubby and I to grill on the BBQ for a quiet night for the two of us. I am passionate about entertaining and setting a beautiful table! I may or may not have an addiction to cloth napkins and fun salad plates oh and goblets too! I think I will always have a home decorating DIY project in the works as long as my hubby is on board with me haha. We have painted A LOT in the 6 homes we have owned in the 35 years that we have been married as well as re-done multiple pieces of furniture, added wall and ceiling treatments, replaced lights, bathroom fixtures and even tiled floors! I have sewn what seems like a million window treatments for our home as well as for family, made slipcovers, and duvets and even a formal dress or two!

View Comments

Recent Posts

Karins Kottage Weekly Linky Party: Spotlight on Creative Bloggers

It's time for another edition of Karins Kottage Weekly Linky Party. We gather to spotlight…

3 days ago

Cinco de Mayo: A How To Set a Festive Tablescape Guide!

Hola, fellow party enthusiasts! With Cinco de Mayo just around the corner, it's time to…

4 days ago

Quick Fix for Broken Wicker Arms on Outdoor Arm Chairs

Quick Fix for Broken Wicker Arms on Outdoor Arm Chairs: A No-Sew Solution

1 week ago

How to Set a Blue and White Outdoor Tablescape

Capturing Coastal Charm: How to Create a Blue and White Outdoor Tablescape Today, I'm thrilled…

1 week ago

Linky Party: How to make fresh salad, DIY’s, Spring Décor!

Last week's Karins Kottage Linky Party was a whirlwind of How to be creative! Inspiration,…

1 week ago

How to style the Perfect Blue Spring Dress for Women Over 50

How to style the perfect blue spring dress for women over 50? I am here…

1 week ago

This website uses cookies.