Karins Kottage

Entertaining * Decorating * Fashion * Travel

  • Contact Us
    • Let’s Collaborate
  • Decorating
    • Tour
      • Coastal Guest Room
      • Dining Room
      • Family Room
      • Front Porch Ideas
      • Kitchen Nook
      • Mud Room Built Ins
      • Shop My Home
    • Crafting
    • DIY
    • Furniture redo
    • Chalk Painting/Painting
    • Organizing
    • Shop My Home
    • Sewing
    • Wall treatments
    • Window treatments
  • Entertaining
    • Baby Showers
    • Birthday Parties
    • Bridal Showers
    • Graduation parties
    • Holidays
      • Christmas
      • Easter
      • 4th of July
      • Halloween
      • Parties
        • Super Bowl Party
        • weddings
      • Thanksgiving
      • Valentines
    • Outdoor Entertaining
    • Tablescapes
  • Fashion
  • Recipes
    • Breads
    • Desserts
    • Main dishes
    • Pasta
    • Recipes
    • Salads
    • Side Dishes
    • Soups
  • Travel
    • Cancun in March
    • Traveling through Italy
    • My Travels to Hong Kong
    • Italy
    • Rogers Gardens- Newport Beach California
Home » How to make Mini Paper umbrella’s

in Crafting

How to make Mini Paper umbrella’s

Today I a sharing how to make Mini Paper Umbrella’s! These are so fun and easy to make!
 
Mini Paper Umbrella DIY- The Style Sisters

So, the other day I needed some paper umbrellas for a fun Cub Scout treat I was going to have the boys make for our den meeting but could not find any while I was out and about.

I was running out of time and decided I could probably whip some up!

 I found a few tutorials on the internet and added a few embellishments of my own. 

How to cut out mini paper umbrella’s

STEP1 – First I found the lid of a jar about 2 1/2″ -3″ around and traced around it on the back of some fun colorful scrapbook paper. 

 
Mini Paper Umbrella DIY- The Style Sisters

STEP 2- I cut around each circle shape with some fun craft scissors to make a ruffled looking edge.  Then I cut out a little pie shape out of one side.

Hot glueing the mini umbrella’s

STEP 3- I used hot glue on one side of the pie shape

Mini Paper Umbrella DIY- The Style Sisters

STEP 4- I attached the glued side over the non glued side to make a small cone shape.

Mini Paper Umbrella DIY- The Style Sisters

You can play with it to make it the shape you want. A low umbrella or a high umbrella..just have fun with it.

Mini Paper Umbrella DIY- The Style Sisters

I wanted to make sure it had a nice point on the tip

Mini Paper Umbrella DIY- The Style Sisters

Adding the toothpick

Step 5- Inside I added a dab of hot glue and poked the toothpick through to the other side. 

 
Mini Paper Umbrella DIY- The Style Sisters

You don’t want the toothpick to come out too far just a little bit.

You have made your first mini umbrella!

Now it is time to decorate it a little bit.

Mini Paper Umbrella DIY- The Style Sisters

Adding mini pom pom’s

STEP 6- I had these tiny tiny pom poms leftover from some scrapbooking project that I never did so I added a dab of hot glue to the pom pom and stuck it on there.

I think they turned out sooo cute!

mini paper umbrella tutorial, scrapbook paper mini umbrellas

Bears on the Beach Cups

I used them for a dessert called Bears on the Beach Pudding Cups…recipe on my blog.

This little dessert teaches the boys how to make something fun for their family.

They totally got into making these! It is a little more creative than making regular dirt cups 😉

teddy bear beach pudding cups
 

Other posts you will love

Here at Karins Kottage I am always finding something to do that is fun and creative 

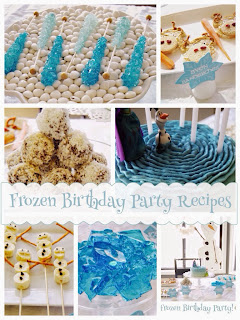
Like my Granddaughters Frozen Birthday party

Frozen birthday party recipes, frozen party food ideas, frozen birthday party
 

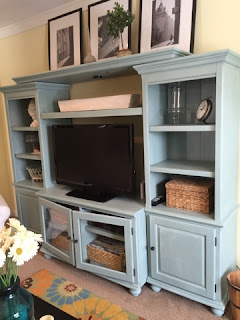
or My chalk painted entertainment makeover with Annie Sloan Chalk Paint

Annie Sloan Chalk Painted Entertainment Center- The Style Sisters
 

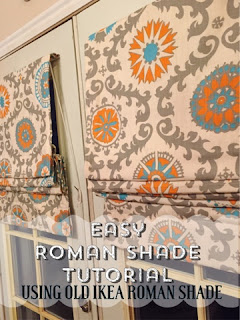
Recently I just finished making my sisters Easy Roman Shades

Easy Roman shade tutorial-using old Ikea shade-The Style Sisters

Party, Cooking or DIY projects I am all about it!

Shop 

3 Comments

Stay connected to the Kottage

don't miss a thing
☞  SIGN UP TO receive THE LATEST news and updates from Karins Kottage ☜
You’ve successfully signed up! Check your email for details.
Previous Post: « Hot Wheels Cake – First attempt with Fondant
Next Post: Easter treats and decor Linky Party »

Reader Interactions

Comments

  1. Julie says

    July 4, 2019 at 6:26 pm

    These are so sweet, much more robust than the flimsy bought ones that I always used to try and keep as a kid for my dolls!!

    Reply
    • admin says

      July 4, 2019 at 10:11 pm

      Julie,
      Thank you so much! I love the fun colors and options I can have by making them myself!
      Thanks for stopping by.
      Hugs,
      Karin

      Reply

Trackbacks

  1. Summer Breeze Centerpiece Wednesday Linky party - Karins Kottage says:
    July 20, 2021 at 4:00 pm

    […] What a fun idea! I have a tutorial on how to make mini paper umbrella’s like these. […]

    Reply

Leave a Reply Cancel reply

Your email address will not be published. Required fields are marked *

Recipe Rating


This site uses Akismet to reduce spam. Learn how your comment data is processed.

Primary Sidebar

Search This Blog

Welcome to Karin’s Kottage!

Summer porch

Hi I am Karin! Welcome to my Kottage. I share all things about life here at the Kottage. Cooking, DIY, Crafts and Travel! Learn more about me and my Kottage by clicking on the photo.

Shop My House

Shop My House
  • Contact Us
  • Decorating
  • Entertaining
  • Fashion
  • Recipes
  • Travel

Footer

Looking For Something

Let’s Get Social

  • Email
  • Facebook
  • Instagram
  • Pinterest
  • RSS
  • Twitter
  • YouTube

RSS RSS feed

  • Outdoor DIY Decor Ideas + Coastal Crafts You’ll Love
  • Easy Roasted Vegetable Sandwiches on Ciabatta – A Crowd-Pleasing Favorite!
  • Patriotic Red White Blue Decor + Stylish IKEA Hack
  • Easy & Charming Red, White & Blue Tablescape

Copyright © 2025 · Market theme by Restored 316