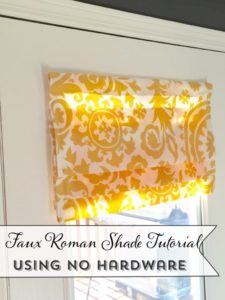
Faux Roman Shade tutorial using no hardware…what? Yes it is true!

I spent last week at my daughter Madeline’s house helping her make these faux roman shades without hardware. Madeline was getting her house ready to put on the market in Idaho Falls and boy did we crank out lots of projects!
Not only did we paint Banisters and stair skirts (which I didn’t even know that is what they are called but I do now!) I LOATHE painting them…. actually not the paint part, it was all the puttying and sanding all the holes and lumps and bumps from 1980’s carpet. You know what I’m talking about… when they would carpet up those areas urrrghghgh……I must really love my daughter an awful lot to do all that!
Any way…. we caulked and sanded and did lots of touching up, I helped her tile a back splash (finished pics to come), plus I had to make time to Play with the grandkids, then do some cleaning, a tid bit of laundry and just all around tried to help where I could.

Making the faux Roman shades without hardware
STEP 1- Measure your window and add 1″ to each side for seams. Add 2 1/2″ at the bottom for the hem and add 3″ for header or however big you want it to be. Fold each edge over 1/4″ and then fold over for the complete measurement, Iron and Pin.


STEP 3- The Pleats- Fold up the fabric to make “pleats” to the size you want and how long you want the shade to hang. We just played with the fabric to see what we liked.

Fold and pin and turn the shade around to see if you like the amount of pleat that shows. Maybe you would like smaller pleats and more of them or larger pleats and fewer of them.
These two pleats measured close to 2″ we think that looks good.

Tip- If your windows are all lined up and somewhat connected…Make sure all your Roman shades end up the same length or it will look funky.

STEP 4- After you have figured out many pleats you like pin them down. Sew up each side top to bottom to hold the pleats in place.

STEP 5- Minimal hand sewing. To keep the pleats from drooping I sewed a running stitch up three separate lines on the back. I just catch a little bit of fabric each time just to hold them in place.

Tip- I used quilting thread as it is a little thicker and therefore stronger.

TIP- I made sure to catch just a little fabric on the front as well just to hold the weight of the pleats.
You can see the other Roman Shade tutorial Here

Hanging the Faux Roman Shade without hardware

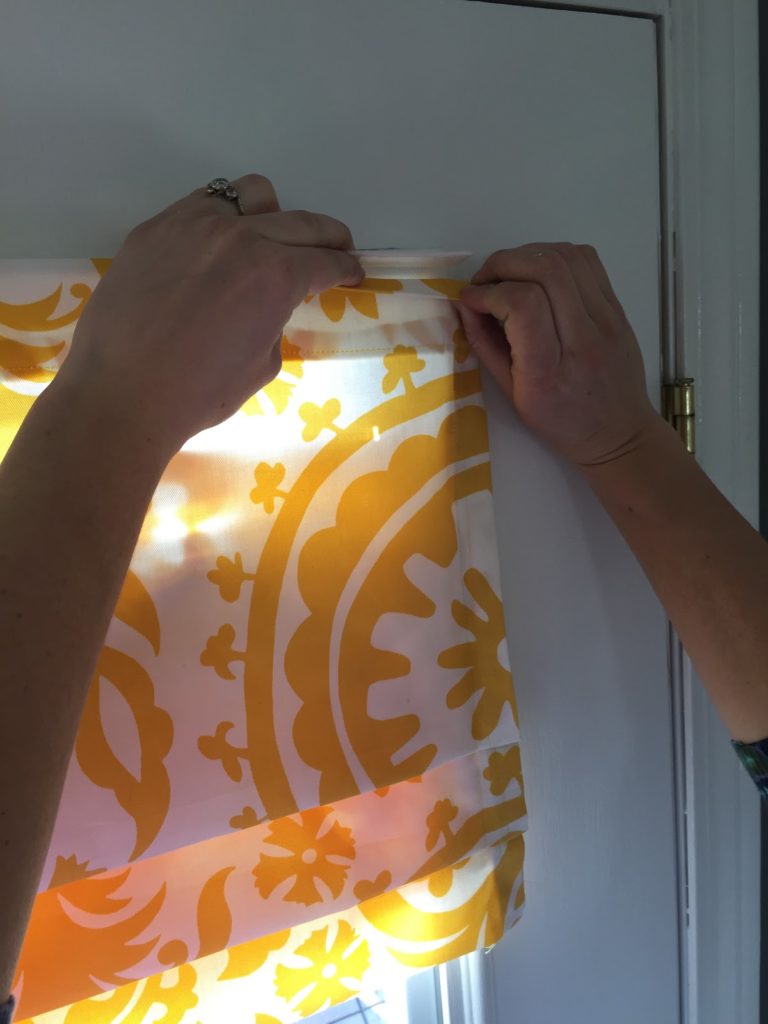
The Lovely Madeline showing you the strips. They are kind of like velcro as they snap into each other

Step 1- Place sticky side to the edge of trim on the door so it will hang a little bit away from the door.

Step 2- Attach another sticky strip to the backside top edge of the Roman Shade and then press into the door sticky strip!
DONE!
Here are a couple of other decor posts you might like
How to make Easy Pillow Covers
Stand back and marvel at the beauty you just created!
Note: No Walls were hurt in this installation.
The Shades hanging in the windows were made to slip a spring rod through the top header of the shade and popped into the window.
SIMPLE CHEAP and BEAUTIFUL faux roman shade tutorial without using hardware.

I have so many people ask where we got this fabric and I think we bought it at a fabric warehouse in Utah but it no longer exists. I have look online to find this fabric too and I cannot find it in yellow. I did find it in a coral red color on Amazon. Here is a link below.
Shop This Post

Pin For Later
I am new to this site but the fake Roman shades are what I was looking for. How do I know how much material I will need to purchase for just a length like yours? I had only heard of Velcro before but heard it didn’t stick to material well. Do you know if that is true? I have blinds at each window I want to make a Roman Shade for in my living room. How will this work because I want to keep the blinds? How can I be sure the shades will stick out to allow to raise and lower the blinds?
Thanks so much for your help. I am retired and live only on S.S. I wanted the Roman Shade “look” but couldn’t afford to purchase them already done. I really like this idea! Thank You!
Hi Peggy!
Yes Velcro works really well on fabric. I just used some on some outdoor seat covers that I made recently. But if your nervous you could see a few stitches to hold it in place but I’ve never had any issues.
To make sure your blinds still work attach your Roman Shade valance to the outside top of the window. You could use a 1 x 2 board and screw it into the area above the window (if you don’t have wood trim surrounding window) then place Velcro on the board and to the back of your Roman shade. That way the Roman shade sticks out a little bit from the wall and it will hang nicely.
To figure out how much fabric you need.. here is a link to a fabric calculator I just found. Hopefully this will help you. https://www.fabric-calculator.com/roman.aspx
And here is another tutorial that also might help you https://www.heytherehome.com/how-to-make-a-faux-roman-shade/
Thanks so much for your questions. Let me know how it turns out.
Hugs,
Karin
Great how-to photos and instructions – I’ve been wanting to update the look in my bedroom so this might be the answer!
Cool idea. I made a similar curtain on a door that was frequently opened, where there was no clearance between the door and wall. Rather than using Command strips though, I stitched a few industrial strength magnets into the top row to secure it to the metal door.
How do I sign up to get your postings sent to in email address please?
Hi Suzanne,
There should be a pop up window that allows you to sign up. I will manually add you.
Thank you for asking 🥰
Karin
Perhaps I am reading this wrong, but you took command strips and stuck them to the window frame, the curtains and then together? Did the strips sticking to the fabric peel off?
Yes that is correct! It worked perfectly! The stickiness is really really strong so it does not come off the fabric or the window frame. If you use a really heave fabric…then it might be a problem but this is a medium weight fabric and it held up great! Thank you for your comments.
Karin
Can you supply the name & manufacturer of the yellow fabric you used? It’s exactly what I have been looking for and I will, of course, use your easy to do blinds. Thank you!
Thank you Teri! Here is a link for a similar looking fabric
https://www.ifabric.com/products/yellow-white-moroccan-canvas-waterproof-outdoor-fabric
I love this idea for a bathroom, where you won ‘t raise and lower them anyway. What a great tutorial. I’m not so great at sewing but I think I could do it.
Andrea,
Yes it is a great option for a bathroom where you wouldn’t be raising and lowering it. You can do it! Love to hear how it turns out.
Karin
Those are so pretty! My daughter is a newlywed with a new home, so I’m going to share this with her, So cute! I’d love for you to share these at the Thursday Favorite Things link party at my blog! Congrats for being featured at Create with Joy, one of my favorite blogs.
Hi Pam! Yes these are perfect for a newlywed with a new home. They really looked amazing when we were done with them. They come together pretty quick too…which I love a fast project! I will pop over to your blog and add my link. Thanks so much for stopping by…it is so nice to meet new people.
Hugs,
Karin
Hi Karin! I am featuring these at the TFT link party today. Thanks for sharing with us! Hugs, Pam
Hi how are you.
I was wondering would you be able to make a faux shade as well a long roman shade for the patio door. Looking for same design?
Thank you
saves lots of money on tension rods. thx glad I found you
That is such a clever trick, and the fabric is so bright and cheerful!
A creative and talented daughter. Wonder where she got that? These turned out so pretty. Thanks for the how to.
Those look terrific! So sunny and pretty!
Rita C at Panoply
Thank you Rita! I really love the print too it just pops off the grey wall. Yellow is just a happy color… I think I need to bring in some of it into my own home 🙂