Karins Kottage

Entertaining * Decorating * Fashion * Travel

  • Contact Us
    • Let’s Collaborate
  • Decorating
    • Tour
      • Coastal Guest Room
      • Dining Room
      • Family Room
      • Front Porch Ideas
      • Kitchen Nook
      • Mud Room Built Ins
      • Shop My Home
    • Crafting
    • DIY
    • Furniture redo
    • Chalk Painting/Painting
    • Organizing
    • Shop My Home
    • Sewing
    • Wall treatments
    • Window treatments
  • Entertaining
    • Baby Showers
    • Birthday Parties
    • Bridal Showers
    • Graduation parties
    • Holidays
      • Christmas
      • Easter
      • 4th of July
      • Halloween
      • Parties
        • Super Bowl Party
        • weddings
      • Thanksgiving
      • Valentines
    • Outdoor Entertaining
    • Tablescapes
  • Fashion
  • Recipes
    • Breads
    • Desserts
    • Main dishes
    • Pasta
    • Recipes
    • Salads
    • Side Dishes
    • Soups
  • Travel
    • Cancun in March
    • Traveling through Italy
    • My Travels to Hong Kong
    • Italy
    • Rogers Gardens- Newport Beach California
Home » No Sew Dining Room Chair Makeover!

in Crafting· Decorating· Furniture redo

No Sew Dining Room Chair Makeover!

NO SEW DINING ROOM CHAIR MAKEOVER
I love this trick of using a little fabric and tucking here and there to create a beautiful new look for minimal amount of time and money….who doesn’t love that?
I have two beige colored parsons chairs and the other four have wicker or rattan backs with blue and white fabric that I normally use in this dining room.
You can see it HERE

Easy steps for No Sew Dining Room Chair Makeover

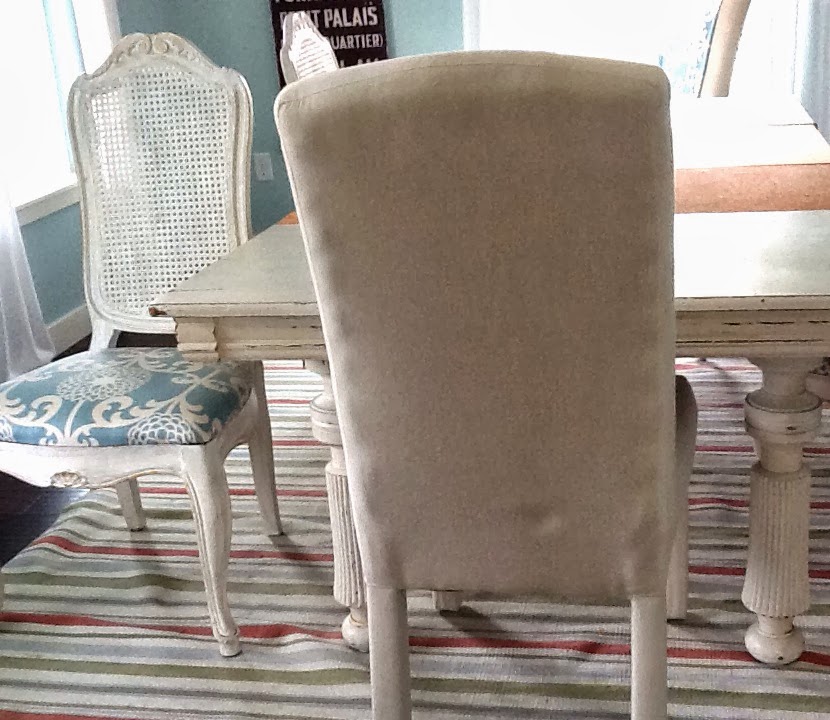
1. Measure your chair from the seat (add some for tuck in) and up and over to see how much you will need.

2. Purchase some coordinating fabric that you like (I got this from Joann’s) then drape over the chair to see how much you will need per chair. The fabric is doubled here…see next photo.

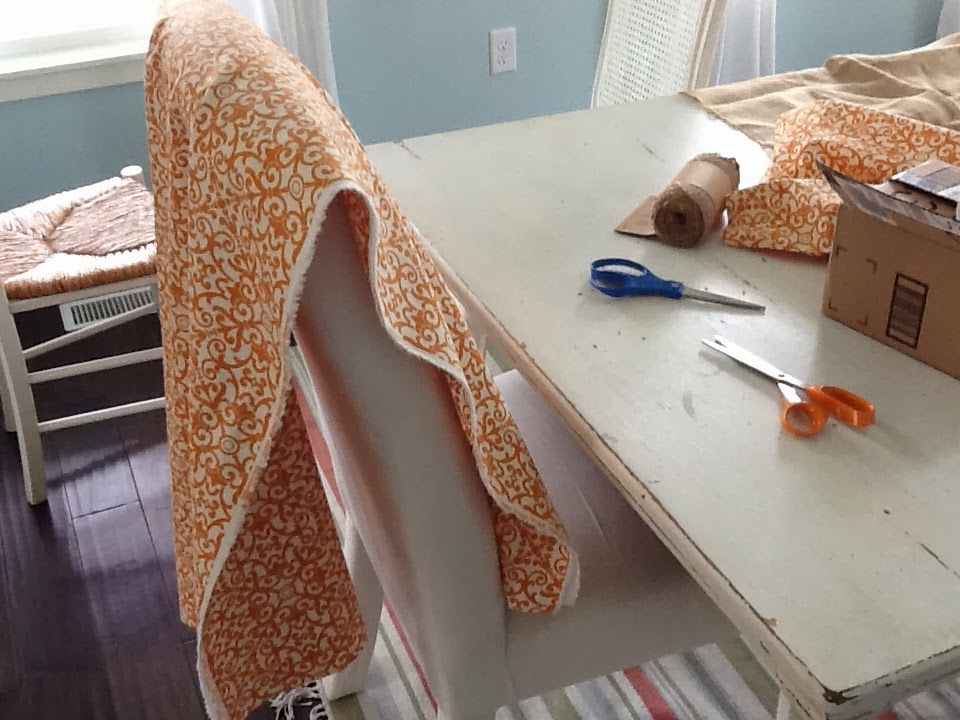
3. Cutting! I cut the fabric right in half. Y

ou won’t need much because you will be gathering it up in the middle and it will look fuller.

4. I folded over each side so that no raw edges were showing.


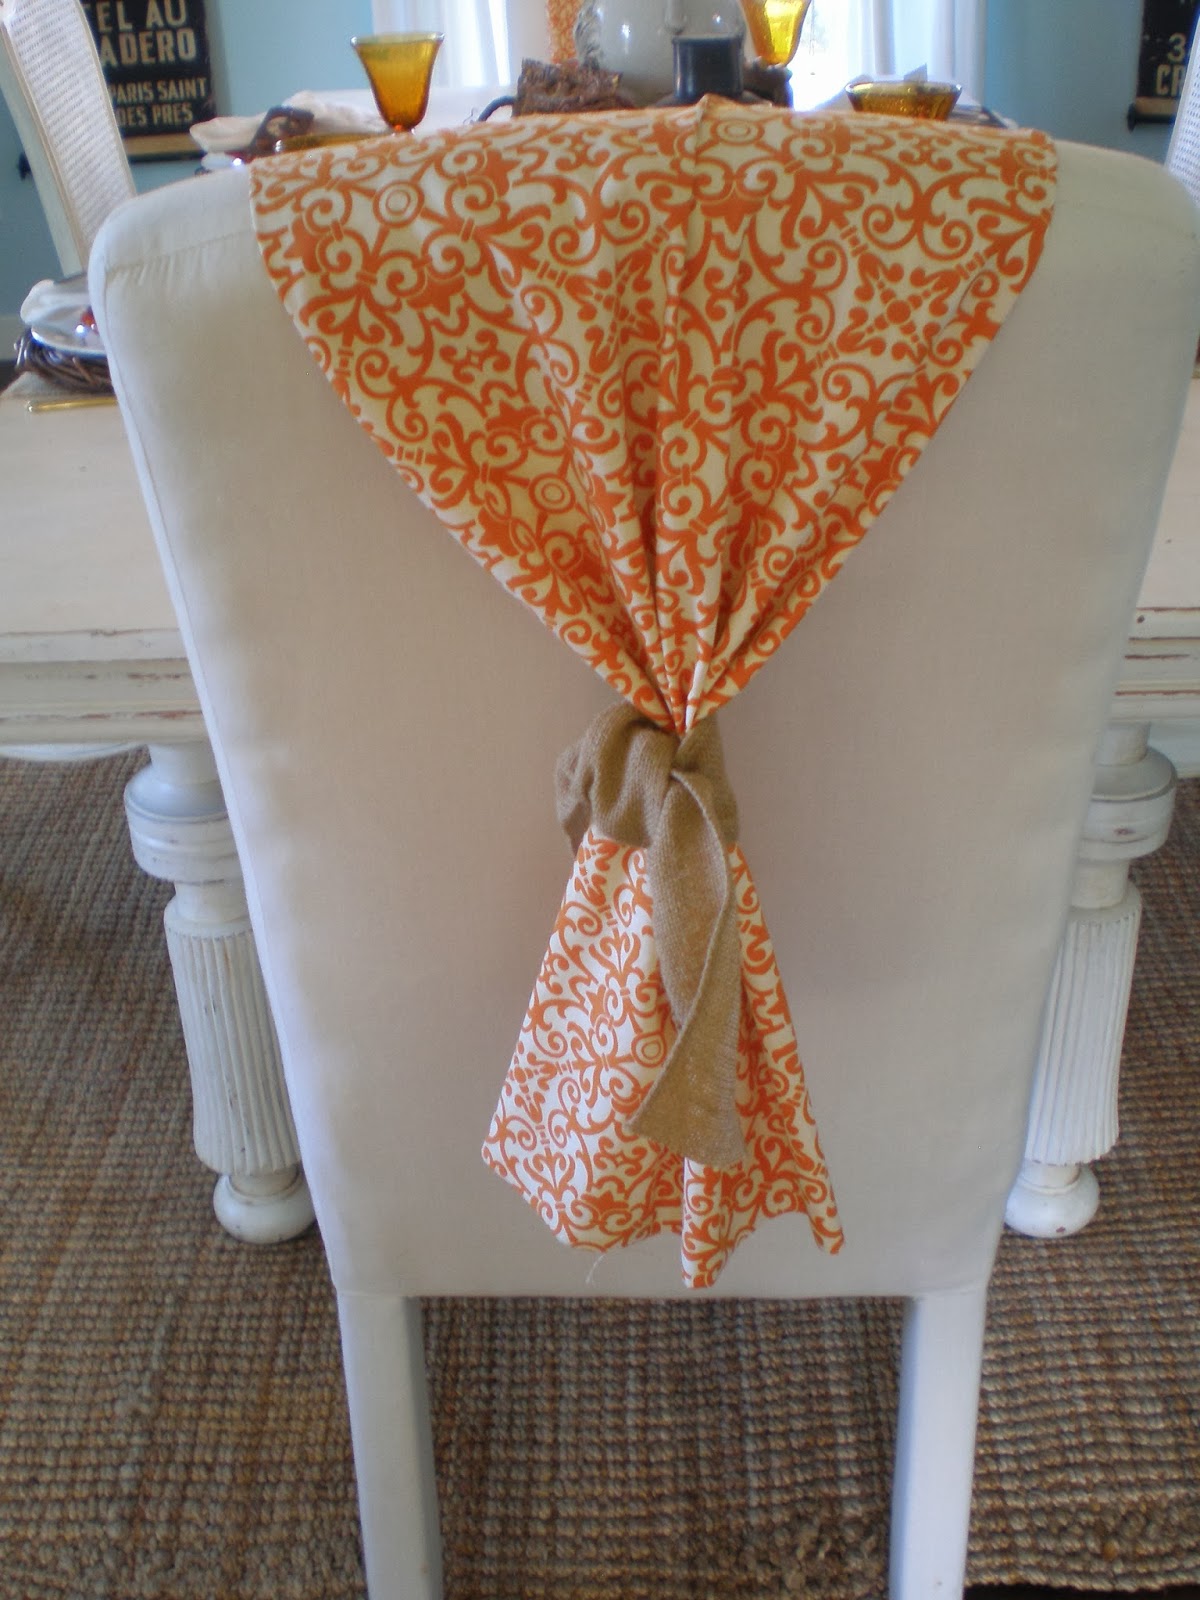
5. Tuck in the bottom so that it won’t come undone when someone sits in the chair.

6. For the back I simply pulled it together using some burlap ribbon I found from Hobby Lobby. I did not finish the bottom edge and it looks great!

Here is what it looks like now.  I switched out the striped rug to the natural sisal looking one and if you want to see more of the fall tablescape you can see it HERE

Happy Fall!

Shop This Post


9 Comments

Stay connected to the Kottage

don't miss a thing
☞  SIGN UP TO receive THE LATEST news and updates from Karins Kottage ☜
You’ve successfully signed up! Check your email for details.
Previous Post: « U Pick Red barn Pumpkins
Next Post: Make Your Own Tiered Plate »

Reader Interactions

Comments

  1. shelley says

    November 5, 2013 at 7:14 pm

    Gotta love simple and easy accessories 🙂

    Reply
  2. Kim Hood says

    November 1, 2013 at 12:41 pm

    This is a simple addition that adds so much more! I love this idea – thanks for sharing. 🙂
    Blessings!
    Kim @ Curtain Queen Creates

    Reply
  3. Linda Bouffard says

    November 1, 2013 at 2:20 am

    Thanks for coming over and sharing at our party. I wanted to let you know that I featured you tonight … PINNED also. Linda

    Reply
  4. Linda Bouffard says

    October 24, 2013 at 4:20 pm

    This is definitely AWESOME!! I love it. Come share it with US SISTERS – tonight THURSDAY at 10 P.M. our party opens What to do Weekends. This is a PERFECT weekend party, is it not? Take care.. following also. Linda

    craftsalamode.com

    Reply
  5. Anonymous says

    October 24, 2013 at 6:13 am

    Hy Karin! I have the same pattern fabric in the same color, only a bigger scale.. You can see my fabric in my pumpkins tutorial on http://shabbycriss.blogspot.ro/2013/10/pumpkin-tutorial.html . Love your chair look. Hugs, Cristina

    Reply
  6. Laurie Hutchinson says

    October 18, 2013 at 9:40 pm

    That is a fabulous idea!! So easy to switch out for the Holidays!

    Reply
  7. Christine Vandormolen says

    October 17, 2013 at 7:08 pm

    wow, what a wonderful idea…..truly creative! Christine from Little Brags

    Reply
  8. thepaintedapron.com says

    October 17, 2013 at 2:29 pm

    I love this idea! Fast and fabulous!
    Jenna

    Reply

Trackbacks

  1. Turn Thrift Store Chair into French Beauty - Karins Kottage says:
    January 8, 2021 at 4:31 pm

    […] Just think, I can change out the fabric on a whim for a different look! Like I did here. […]

    Reply

Leave a Reply Cancel reply

Your email address will not be published. Required fields are marked *

Recipe Rating


This site uses Akismet to reduce spam. Learn how your comment data is processed.

Primary Sidebar

Search This Blog

Welcome to Karin’s Kottage!

Summer porch

Hi I am Karin! Welcome to my Kottage. I share all things about life here at the Kottage. Cooking, DIY, Crafts and Travel! Learn more about me and my Kottage by clicking on the photo.

Shop My House

Shop My House
  • Contact Us
  • Decorating
  • Entertaining
  • Fashion
  • Recipes
  • Travel

Footer

Looking For Something

Let’s Get Social

  • Email
  • Facebook
  • Instagram
  • Pinterest
  • RSS
  • Twitter
  • YouTube

RSS RSS feed

  • Outdoor DIY Decor Ideas + Coastal Crafts You’ll Love
  • Easy Roasted Vegetable Sandwiches on Ciabatta – A Crowd-Pleasing Favorite!
  • Patriotic Red White Blue Decor + Stylish IKEA Hack
  • Easy & Charming Red, White & Blue Tablescape

Copyright © 2025 · Market theme by Restored 316