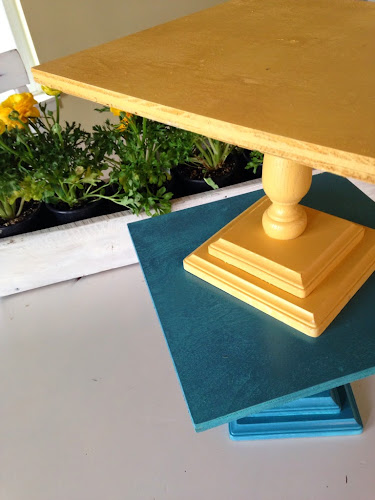
I am so excited to share this tutorial with you!! These cake plates are awesome they hold 1 dozen cupcakes or any size cake or other desserts…(because they are painted use a doiley if raw food will be touching the painted surface). They are perfect for weddings, parties and receptions of any kind and best of all you can personalize them to match your look!
Here is the white cake stand with a dozen cupcakes on it.
I was trying to find the right color turqoise to match the color of the adorable hot air balloons (tutorial here) that we used at the Women’s conference….I ended up finding the perfect color at Lowes.
Things you need- this made 4 cake stands!
Electric drill
2 screws per stand (we just used what we had in the garage make sure they are long enough)
glue
putty
sandpaper
Approx a 24″ x 24″ piece of plywood 1/4″ thick we got ours at Lowes and had them cut it into 4 equal pieces. Each piece was cut approx 12″ square
4 wooden spindles also at Lowes and
2 base pieces per stand. I found these at Hobby Lobby in the clock making section! They come in round shapes too but I liked the squares the best
Metal trim from Hobby Lobby (each bundle is enough for 2 cake stands)
Metal scissors or other type of metal cutters
Staple gun and small staples
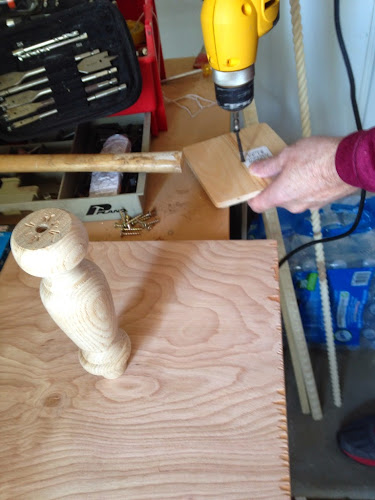
We measured each top to find the center. The pieces were not all exactly 12″ square. Then we drilled a hole a little larger than the head of the screw so it would sink down below the top of cake stand.
For the spindles we also drilled holes top and bottom so the screws would more easily get through the wood. Make sure you get fairly long screws to go into spindle to hold top in place. We also added wood glue to the tops and bottoms for more strength.
Then we attached the top to the spindle…you need a fairly powerful drill or at least one charged longer than five seconds! Hahah
Find the middle of the smaller base and drill a pilot hole…the bigger base is just glued to the smaller base so no need to drill a hole in that one.
Attach small pedestal base to the spindle. Glue the big base onto the small base making sure you line up everything perfectly….or at least eyeball perfect 😉 let dry.
Next comes the cool metal trim…I found this at Hobby Lobby…on a little rack by the flowers. It is very pliable but some of it has sharp edges. You will need two people to do this part. One to hold the trim in place and the other to staple it on there. You can’t even tell there are staples in it. Just make sure to staple over a little piece of the metal to hold it in place. Once you get to the end just overlap the two raw edges and staple in place. Fold in the raw edges just a little bit using pliers just so you won’t cut yourself when you brush your hand over it.
Putty the hole in the middle, let dry and sand.
I love this Valspar spray paint..it is not runny, it covers really well and they have lots of color choices! I am not getting paid to say this either…although I would like to be lol but seriously I tried krylon from Walmart and it was a lot runnier and did not cover as well. The name of the paint colors I used were Morning Mist (white) in satin finish, Peacock blue in gloss finish and Hubbell House Golden Maize in satin finish. No reason why I grabbed one in a gloss finish…. it doesn’t seem all that glossy…but I really like it!
I painted these two first before adding the metal trim…I like them plain but the edges are kind of rough looking. I thought about all kinds of different trim to add to these cake plates…what about ribbon or pompoms?
The possibilities are endless.
Well I hope you have been inspired to try making some yourself…let me know if you do..I would love to see them!!
If you want instant gratification check out my instant cake plate tutorial that uses no glue and two things from Ikea!
Linking to


These are very pretty.
Love these!