Karins Kottage

Entertaining * Decorating * Fashion * Travel

  • Contact Us
    • Let’s Collaborate
  • Decorating
    • Tour
      • Coastal Guest Room
      • Dining Room
      • Family Room
      • Front Porch Ideas
      • Kitchen Nook
      • Mud Room Built Ins
      • Shop My Home
    • Crafting
    • DIY
    • Furniture redo
    • Chalk Painting/Painting
    • Organizing
    • Shop My Home
    • Sewing
    • Wall treatments
    • Window treatments
  • Entertaining
    • Baby Showers
    • Birthday Parties
    • Bridal Showers
    • Graduation parties
    • Holidays
      • Christmas
      • Easter
      • 4th of July
      • Halloween
      • Parties
        • Super Bowl Party
        • weddings
      • Thanksgiving
      • Valentines
    • Outdoor Entertaining
    • Tablescapes
  • Fashion
  • Recipes
    • Breads
    • Desserts
    • Main dishes
    • Pasta
    • Recipes
    • Salads
    • Side Dishes
    • Soups
  • Travel
    • Cancun in March
    • Traveling through Italy
    • My Travels to Hong Kong
    • Italy
    • Rogers Gardens- Newport Beach California
Home » Itty Bitty Ruffle Shoe tutorial

in Crafting· Sewing

Itty Bitty Ruffle Shoe tutorial

Itty bitty ruffle shoe tutorial, baby girl shoe tutorial, the style sisters

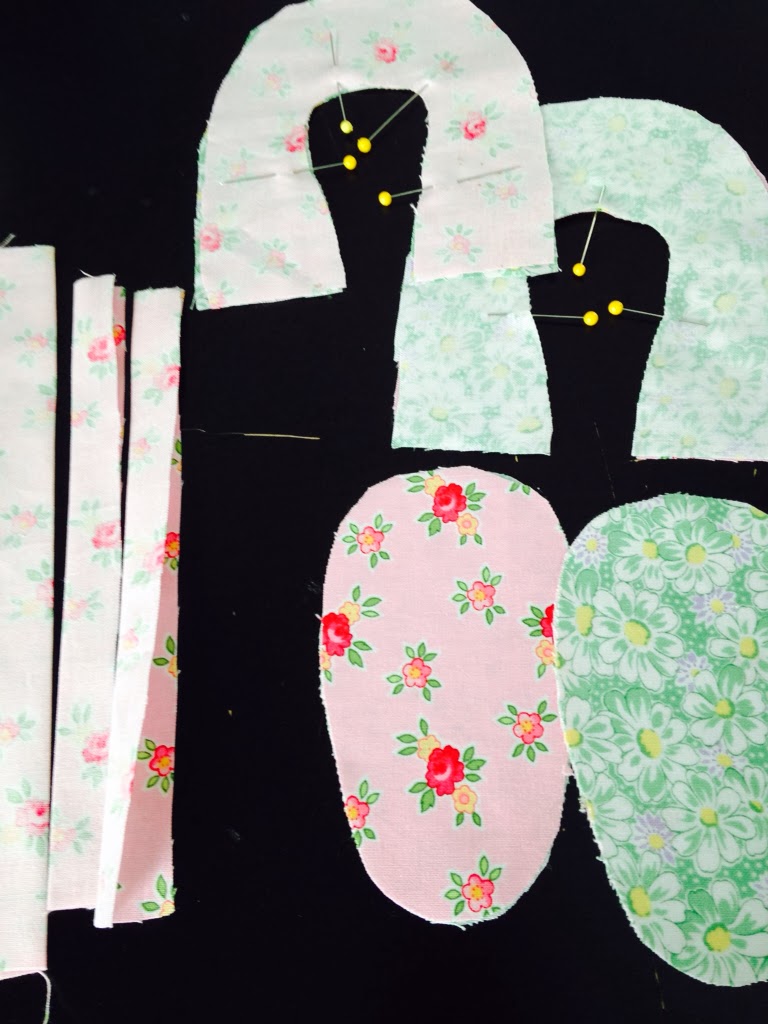
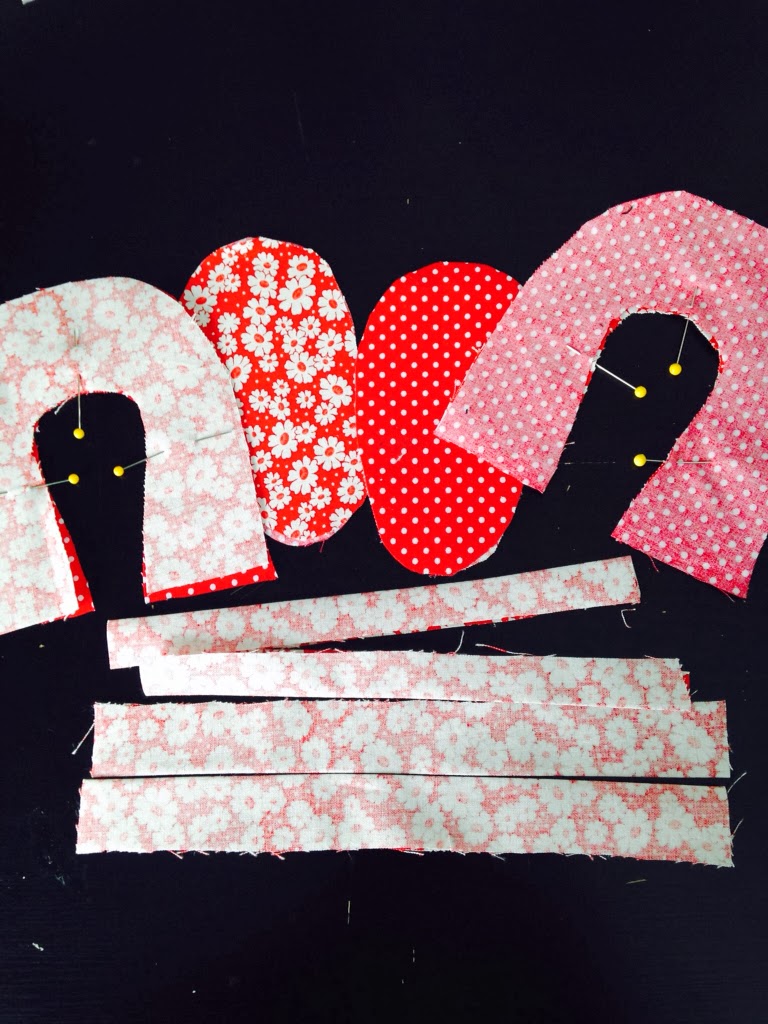
Don’t you love those words..”itty bitty”? It just makes me automatically think of something cute and when I saw this tutorial on FLEETING THING how to make these adorable ruffle shoes for a baby girl I had to give them a try. They were a little tricky..the pattern and full directions are on FLEETING THING blog

The 4 pattern pieces are quick and easy to cut out
Then you sew up the horse shoe section..easy peasy
I clipped into the curves so they would be easier to fold over and iron

Here is the piece turned right side out getting ready to iron.
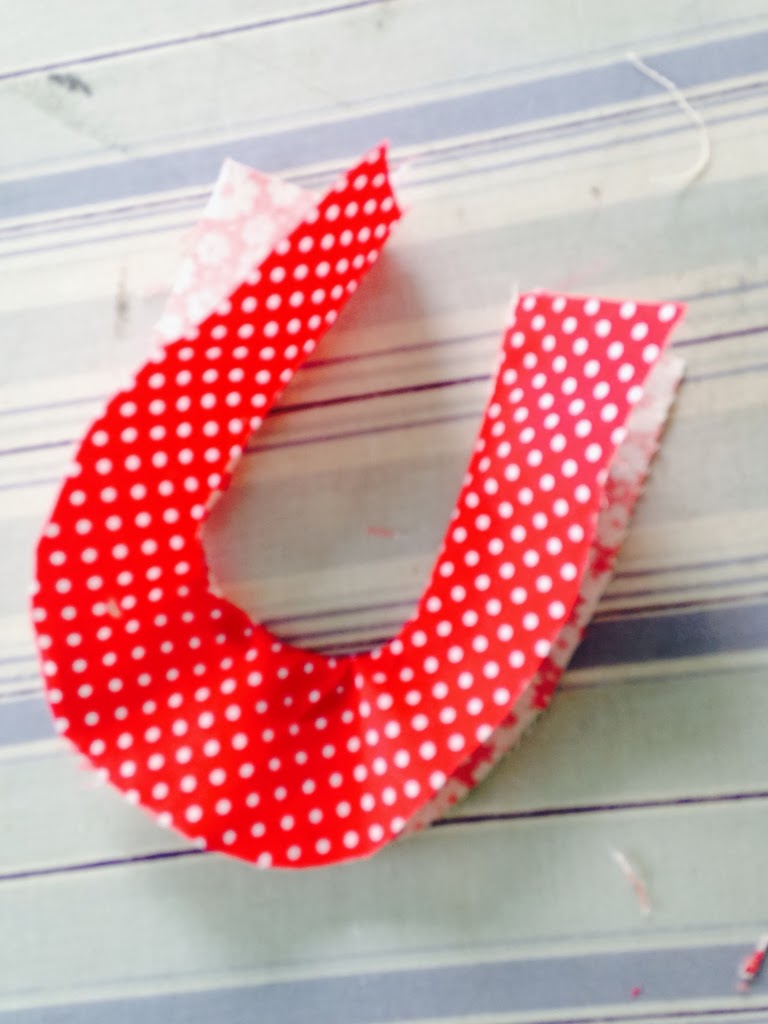
Ironed flat

Now the tricky part….the little ruffles! They are tiny tiny….

Once you sew them you need to turn them right side out. I used and safety pin and some yarn…prolly should’ve used a string..the yarn was a little too fat but still worked. Tuck the safety pin and a little of the fabric inside to make it easier to feed through the tube.
Then slide safety pin with yarn attached all the way through….I thought my fingers were going to fall off! This is tedious for….ah hem…”older” fingers 🙂

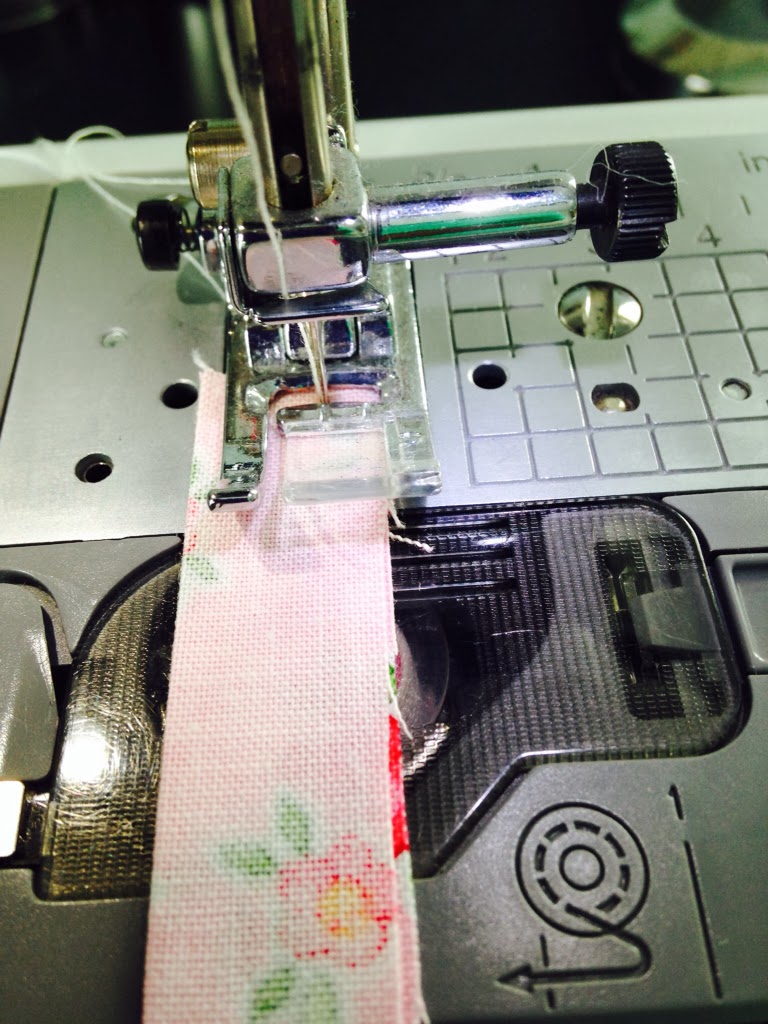
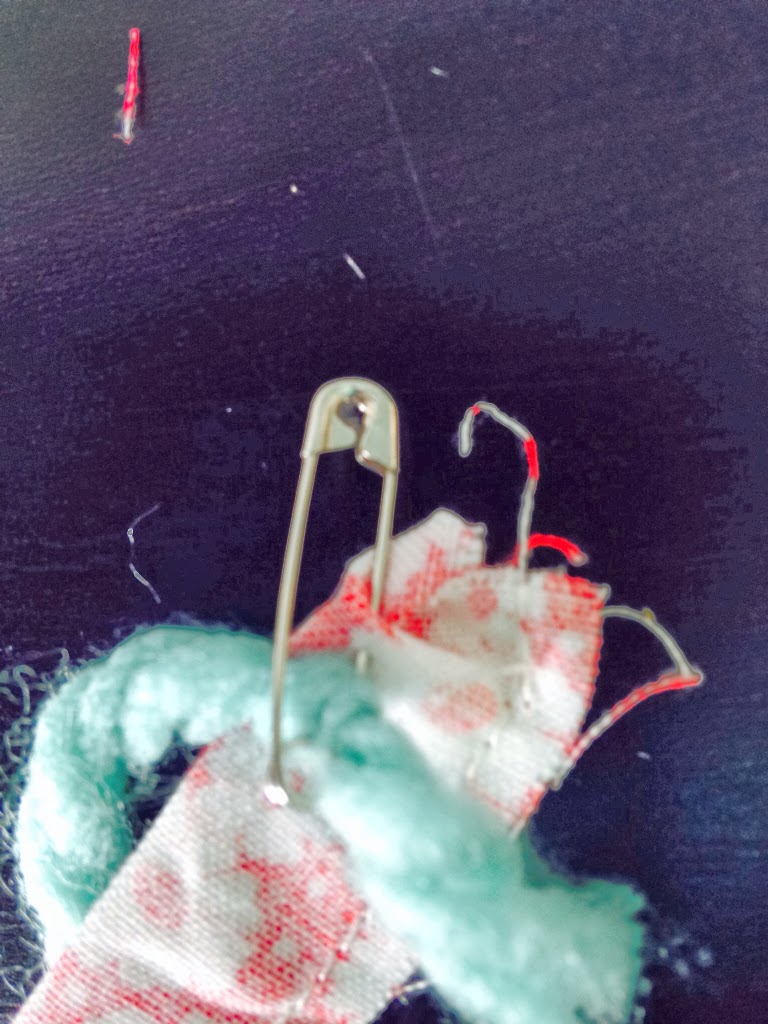
Phew! Finally got it through! Now you gather each tiny piece into ruffles, one large and one small but they are both tiny! Then you sew the large ruffle onto shoe first and then the smallest ruffle and make sure you angle the ruffles off the edge of each side. See her directions.

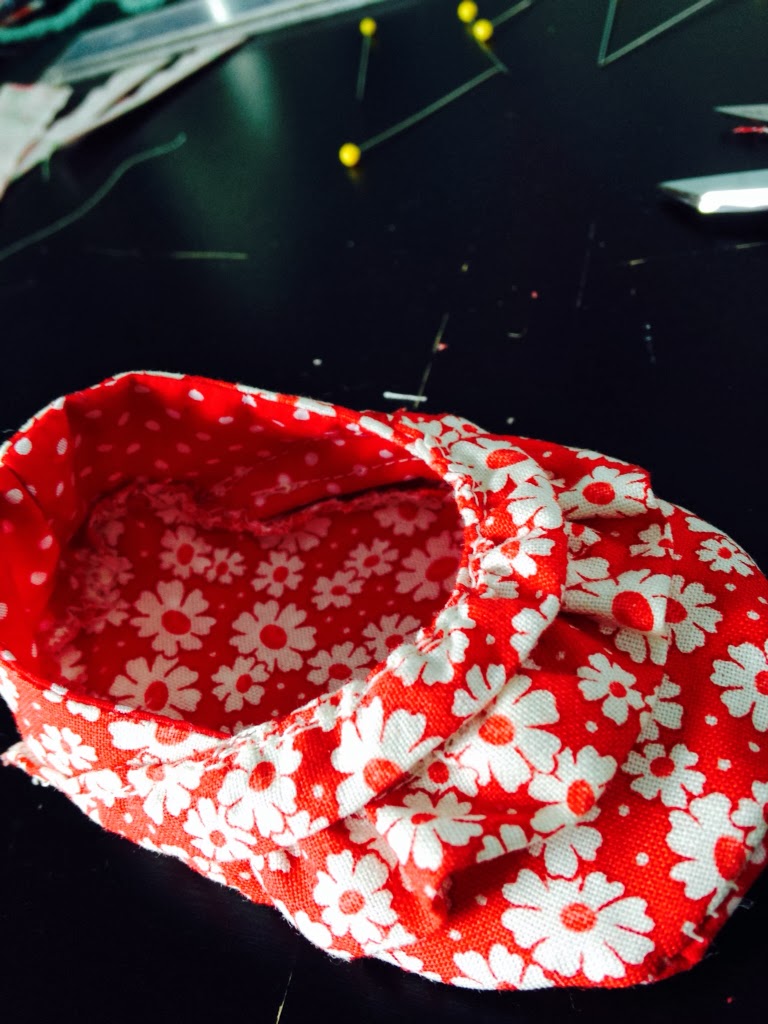
Once ruffles are attached its time to sew the body onto the sole. See the wings…make sure they are there sticking out…it’s the ruffle edges…and you want to make sure they are sticking out…ask me how I know this???

So yeah…I didn’t make sure they were sticking out the first time I made them….you can see the bottom edge here..the edge of the ruffle is not incased in the seam and the raw edge is sticking out. Grrrrr..unpicking is not my fav thing to do 🙁

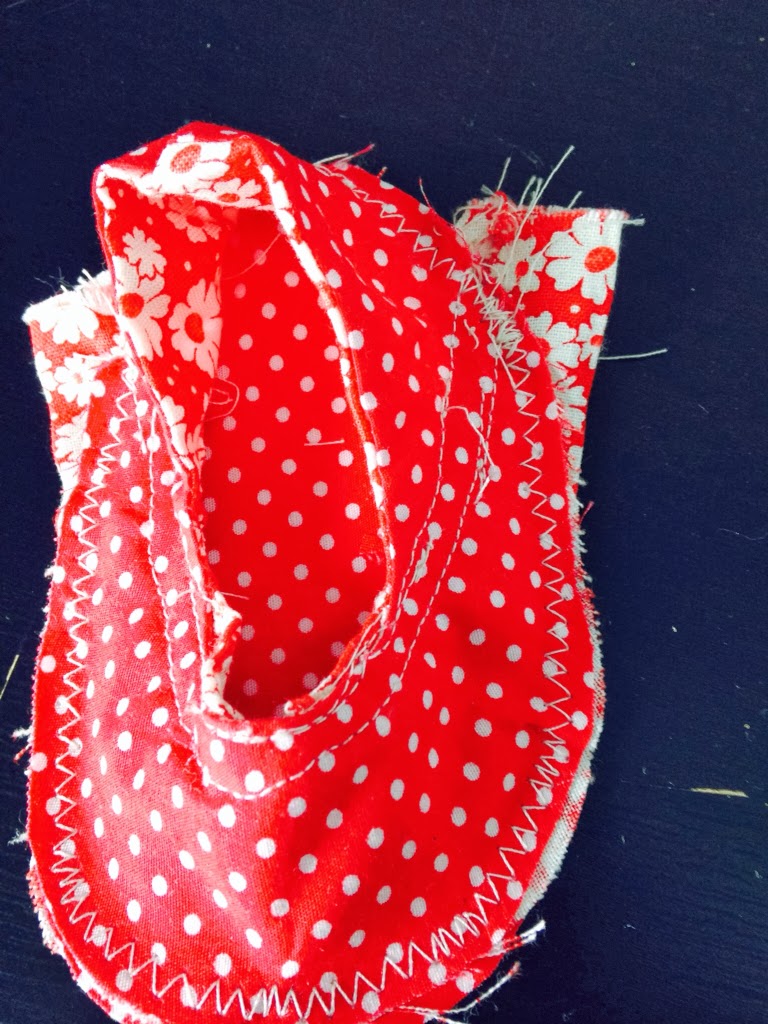
Once you are sure they are sewn in…trim the wings off.

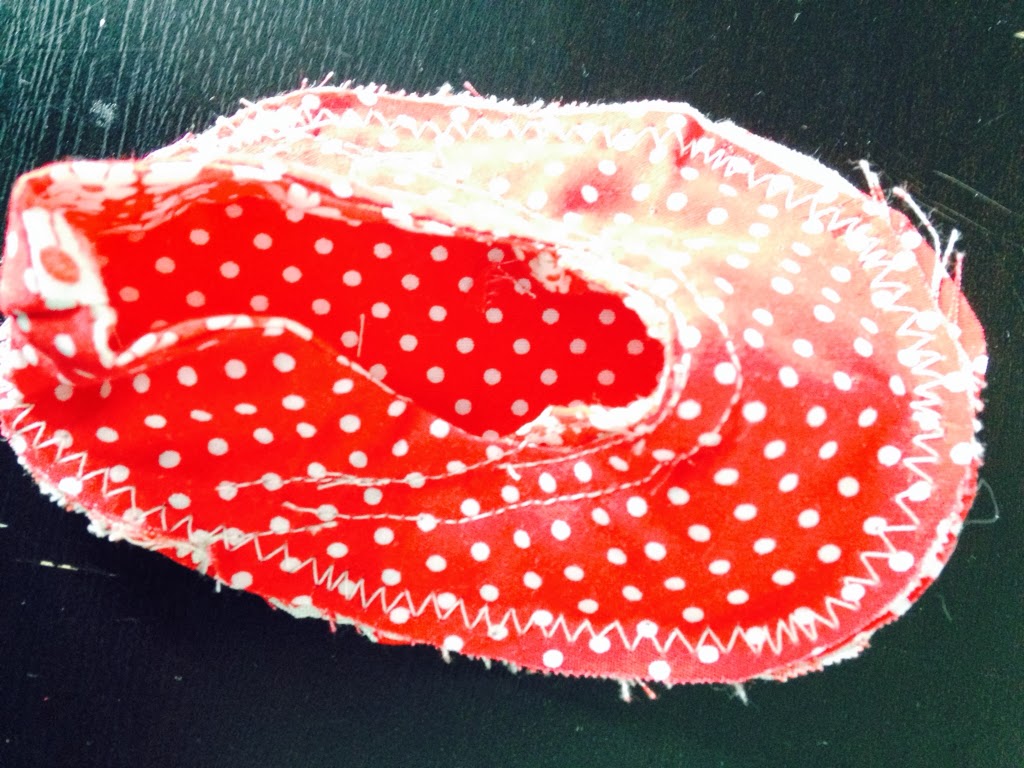
Turn shoe rightside out and just look at the itty bitty cuteness!!!!

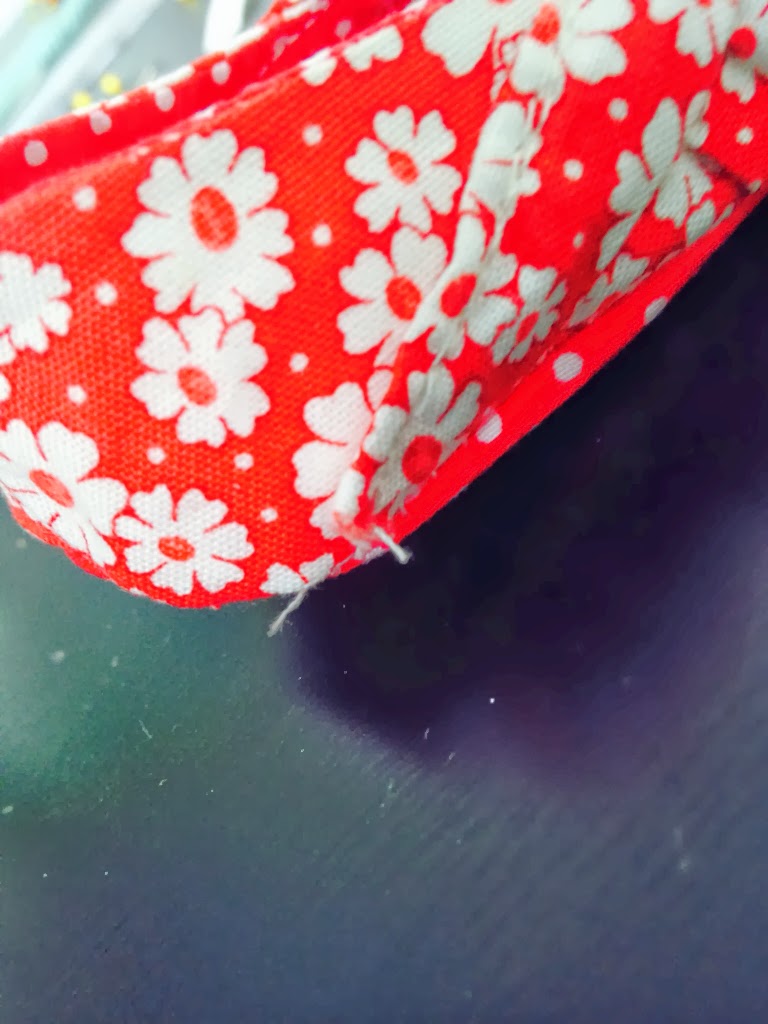
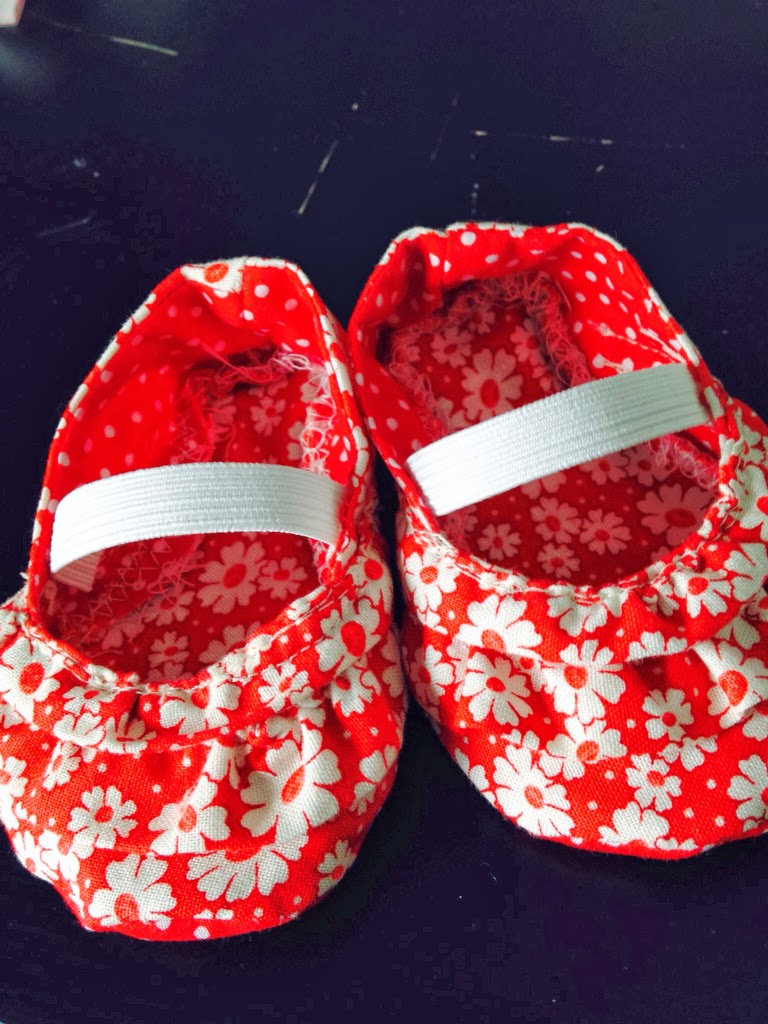
Add some elastic hand sewed into each side of the shoe

I can’t wait to wrap them up for my friends that just had baby girls!

The fabric I used is from FAT QUARTER SHOP so many cute fabrics to choose from!!! I have lots of fabric crafts spinning in my mind.Karin 🙂 Linking to Thededicatedhouse savvysouthernstyle betweegnnapsontheporch ivyandelephants tipjunkie underthetableanddreaming inspirationmonday wonderfulathome Common GroundMasterpiece Monday @ Boogieboard CottageMaking The World Cuter @ Making The World Cuter Mop It Up Monday @ I Should Be Mopping The FloorDIY’ERS @ Home Coming my uncommon slice of suburbia welcomefridays 

Posted with BlogsyPosted with Blogsy

4 Comments

Stay connected to the Kottage

don't miss a thing
☞  SIGN UP TO receive THE LATEST news and updates from Karins Kottage ☜
You’ve successfully signed up! Check your email for details.
Previous Post: « Fashion Friday- Tickled Pink
Next Post: Chipolte Chicken tacos and Black Beans with the Gals »

Reader Interactions

Comments

  1. Theresa Eldridge says

    February 27, 2014 at 3:44 am

    I love these!!! Your fabric choices are gorgeous!!!! I can't get the links to work but I sooooooo wanna make these!!!

    Reply
  2. Laurie Ritchey says

    February 13, 2014 at 2:09 am

    Those are just the caaa-utest things! Love them. laurie

    Reply
  3. Anonymous says

    February 11, 2014 at 4:16 am

    I wish I had someone to make these for, they are just darling! I guess I will just have to start asking people to have babies so I can make them little shoes. Adorable!

    Reply
    • Style Sisters says

      February 11, 2014 at 7:02 pm

      Lol I know…they just make you want to figure out someone to give them to. Every person I've shown them to always squeals with delight! I think I need to make more!
      Karin

      Reply

Leave a Reply Cancel reply

Your email address will not be published. Required fields are marked *

Recipe Rating


This site uses Akismet to reduce spam. Learn how your comment data is processed.

Primary Sidebar

Search This Blog

Welcome to Karin’s Kottage!

Summer porch

Hi I am Karin! Welcome to my Kottage. I share all things about life here at the Kottage. Cooking, DIY, Crafts and Travel! Learn more about me and my Kottage by clicking on the photo.

Shop My House

Shop My House
  • Contact Us
  • Decorating
  • Entertaining
  • Fashion
  • Recipes
  • Travel

Footer

Looking For Something

Let’s Get Social

  • Email
  • Facebook
  • Instagram
  • Pinterest
  • RSS
  • Twitter
  • YouTube

RSS RSS feed

  • Outdoor DIY Decor Ideas + Coastal Crafts You’ll Love
  • Easy Roasted Vegetable Sandwiches on Ciabatta – A Crowd-Pleasing Favorite!
  • Patriotic Red White Blue Decor + Stylish IKEA Hack
  • Easy & Charming Red, White & Blue Tablescape

Copyright © 2025 · Market theme by Restored 316