Have you ever dreamed of giving a tired basement bathroom a fresh makeover, without busting your budget? That’s exactly what we accomplished with our basement bathroom redo, and I couldn’t be happier with how it turned out! This small bathroom had seen better days, and with four people using it daily, it was time for an upgrade that balanced functionality and style. Here’s how my daughter and her husband took on the challenge and completely transformed the space

Before: A Basic Bathroom in Need of Love
The bathroom started as a basic, compact space with:
- A standard wood bathroom cabinet
- A dark faucet
- Shelves over the toilet that were falling off the wall
- Basic tile flooring
- A plain shower curtain
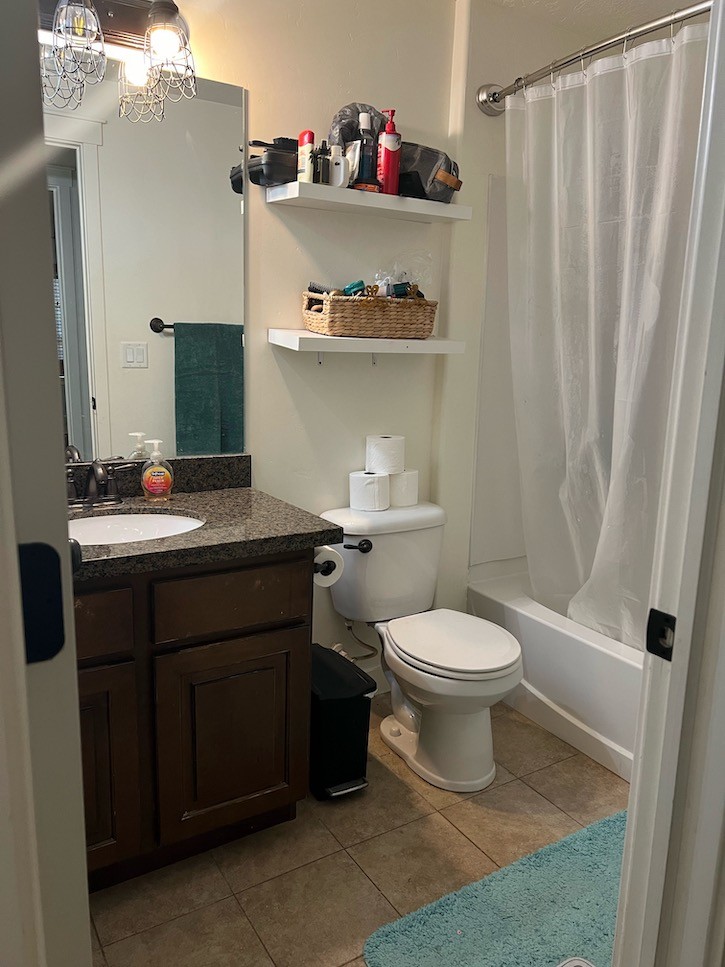
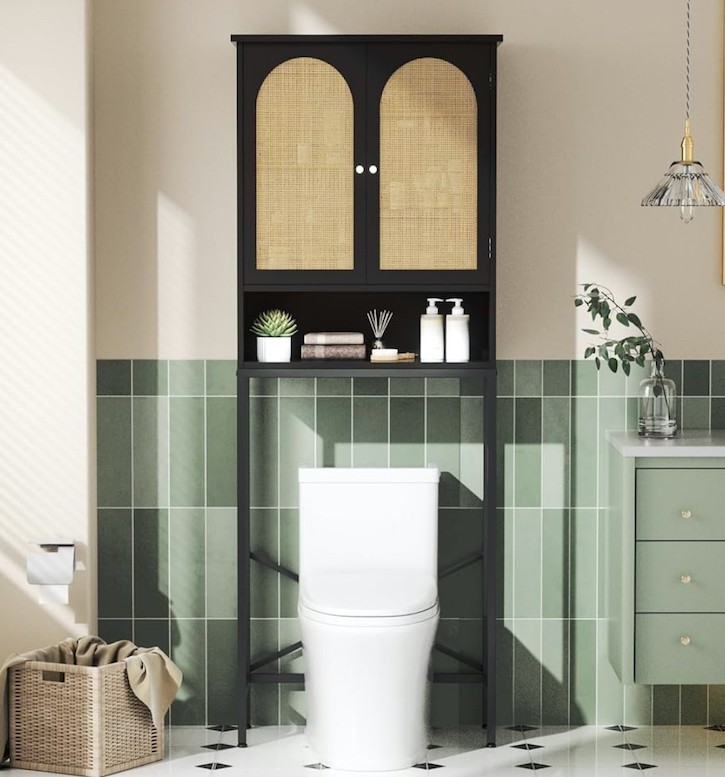
While functional, it lacked personality and storage solutions that could withstand daily use. We found inspiration in a photo featuring a beautiful green cabinet, a gold faucet, a chic black and tan storage piece above the toilet, and eye-catching tile. Inspired, we decided to tackle the project with a few cosmetic changes—no major renovations required!
The Plan and Preparation
Though I initially thought about entering this project into the One Room Challenge, life got in the way, and I never completed the posting. This was the inspiration photo my daughter found that we fell in love with. Green, black and tan.
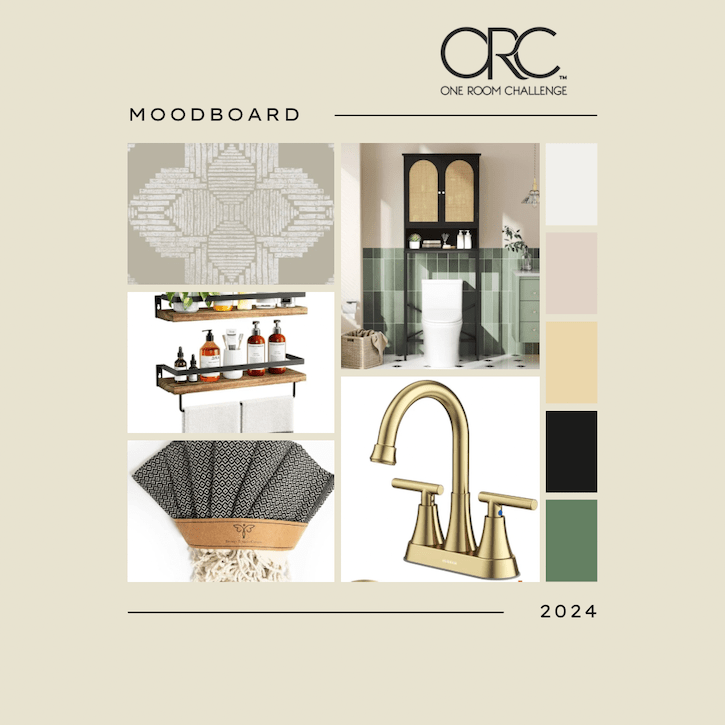
I created this mood board with the things we wanted to add and the colors for the One Room Challenge.
My daughter Emily and her husband Kevin took the reins, planning and executing every step. They began by prepping the space:
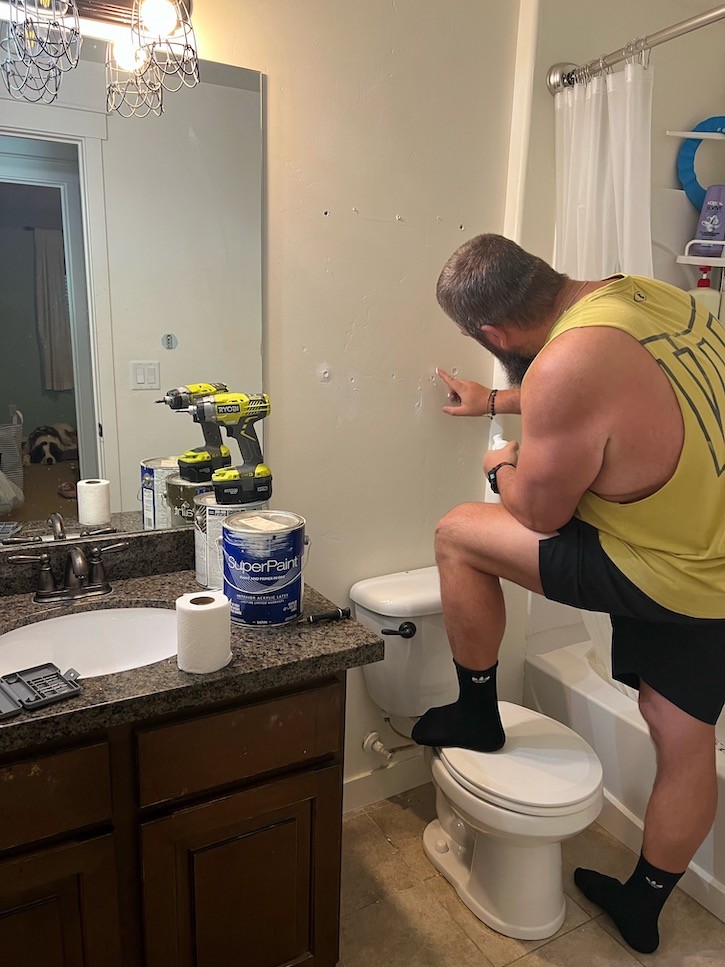
- Removing the old shelves: The leaning shelves over the toilet had to go. They served their purpose for a few years but ultimately didn’t meet the storage needs of a busy bathroom. You may remember when I added them to my small beachy bathroom makeover here.
- Patching the walls: After removing the shelves, Kevin patched and smoothed the walls to create a fresh canvas.
The Basement Bathroom Budget Makeover Begins
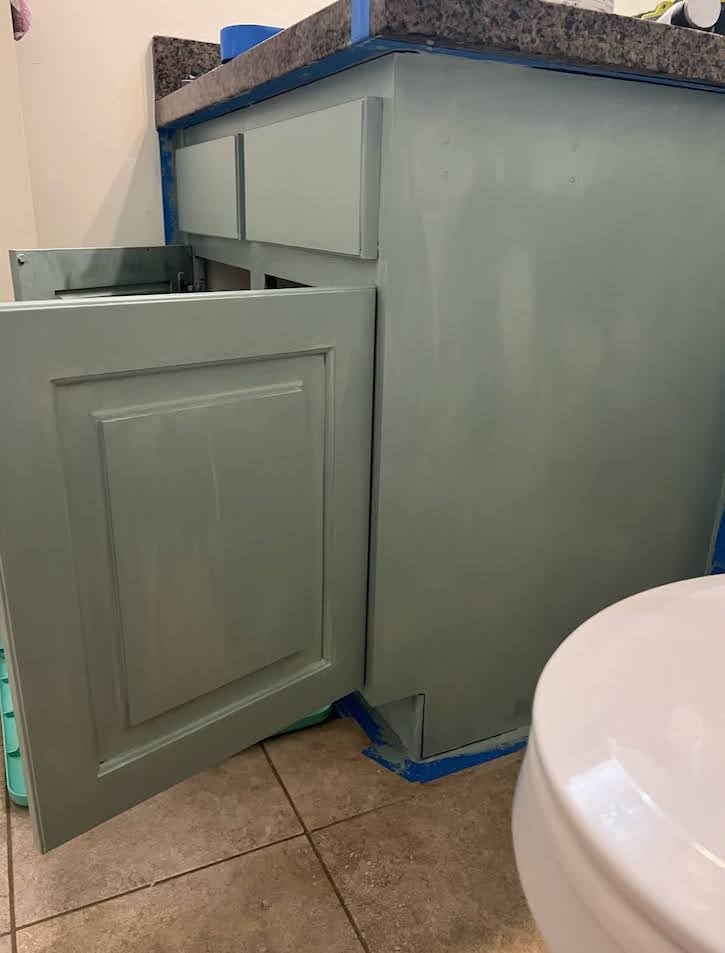
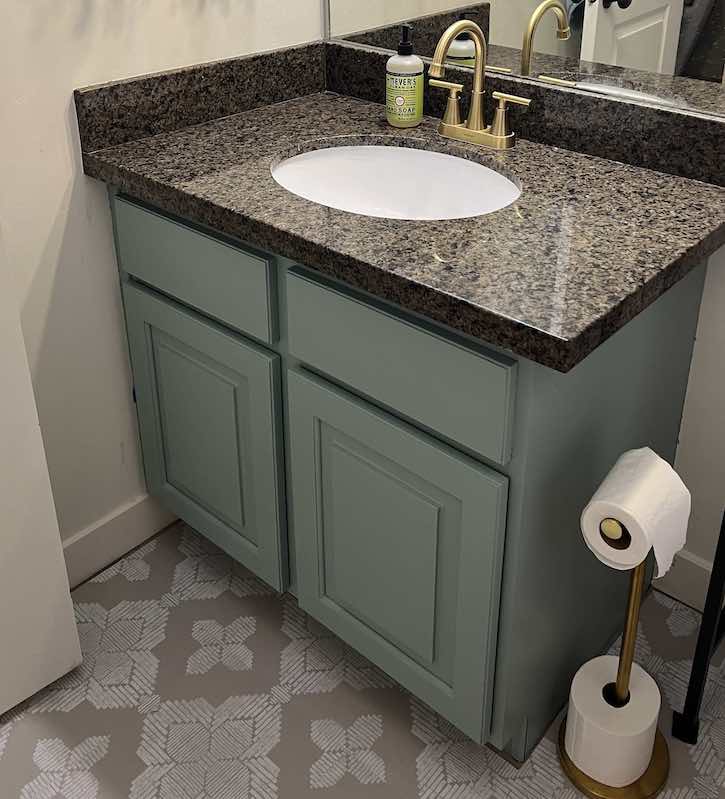
1. Painting the Cabinet
Emily found leftover green paint in the garage—the same shade we used on our house exterior—and got to work.
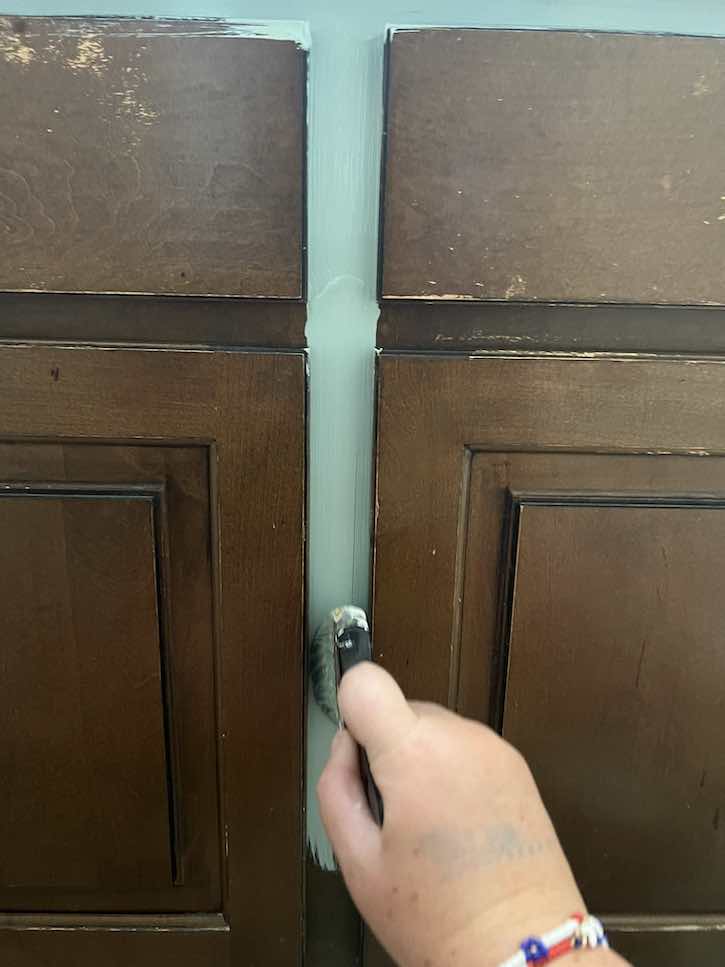
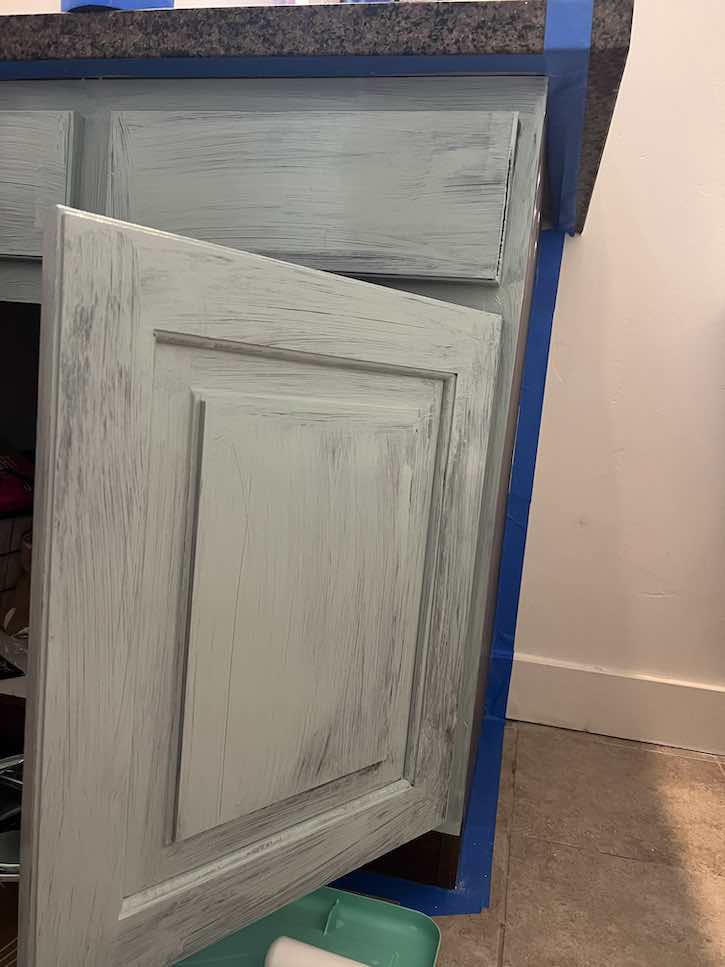
After scrubbing and lightly sanding the cabinet, she painted it this gorgeous green hue. It’s amazing how a fresh coat of paint can make a piece look brand new!
Remember when I painted my primary bathroom cabinets with chalkboard paint here? I still love how the creamy white cabinets look and have held up all these years.
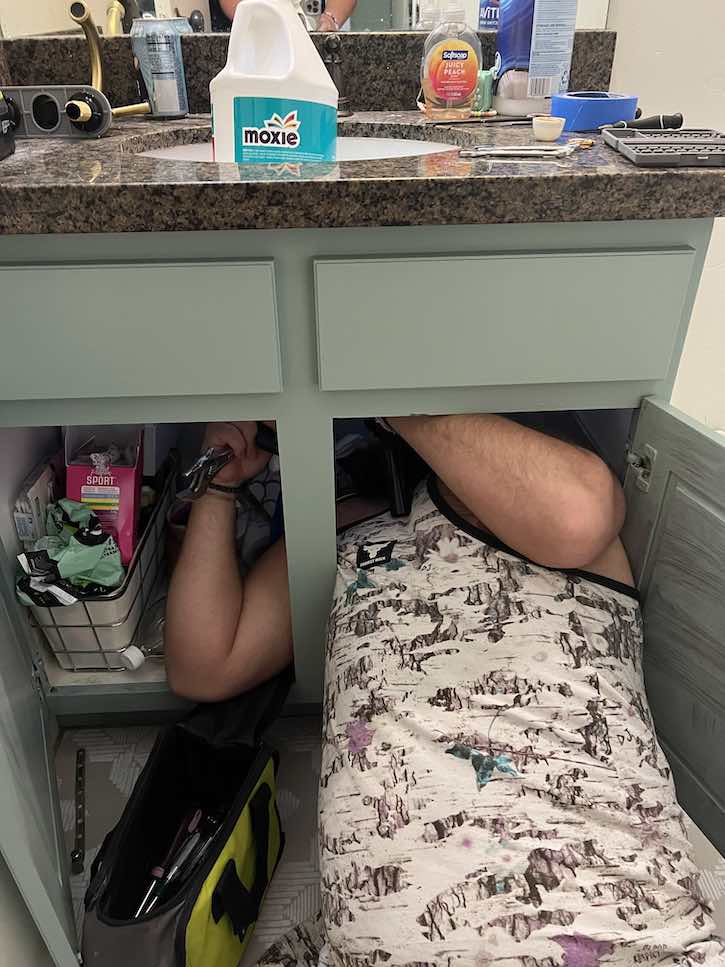
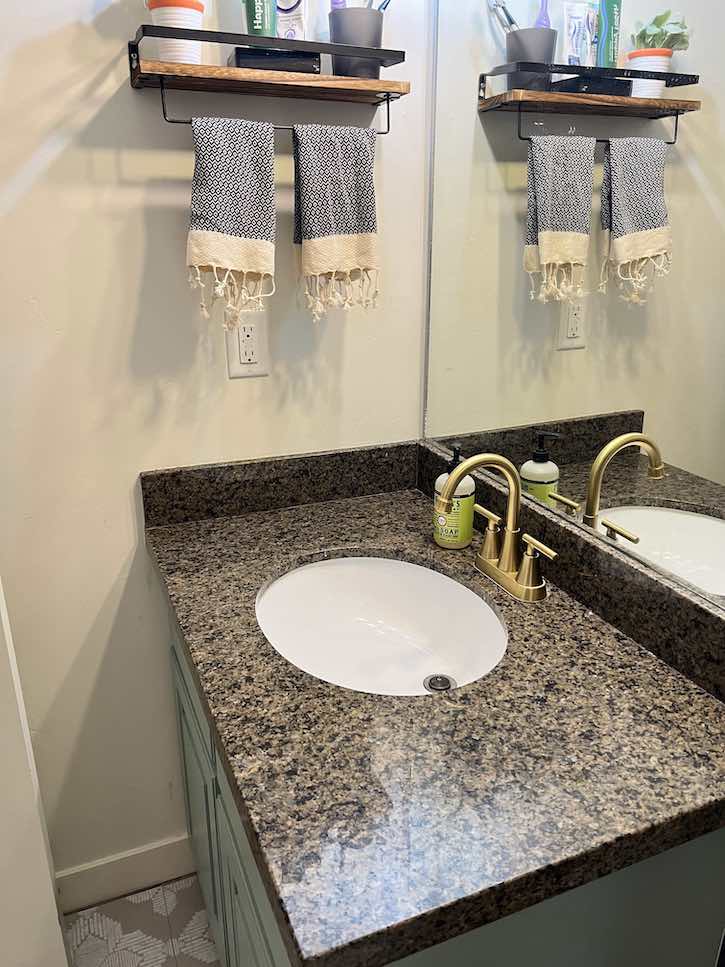
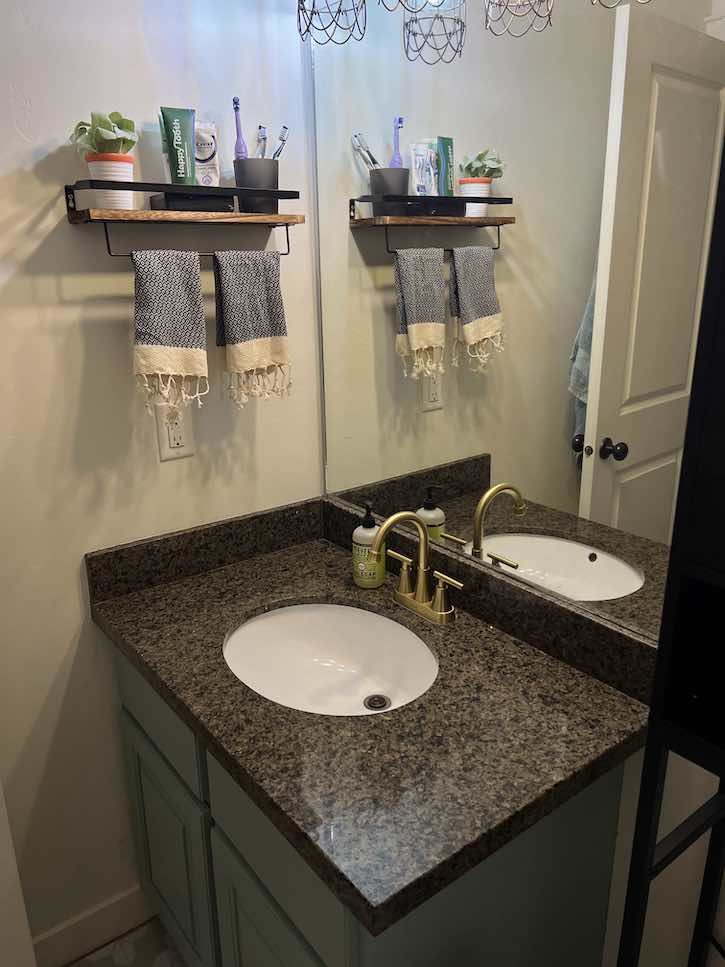
2. Installing the brass faucet
Emily found this cute brass faucet with gooseneck look to it. I love how it brightened up and brought in a little shimmer to the room. It has a classic look to it that will last for years to come. Kevin had to get under the sink to take out the old one and install the new one.
3. Updating the Tile
While we initially considered replacing the tile entirely, it felt like too big of an undertaking for this project. Instead, we opted for peel-and-stick tiles, which went right over the existing flooring.
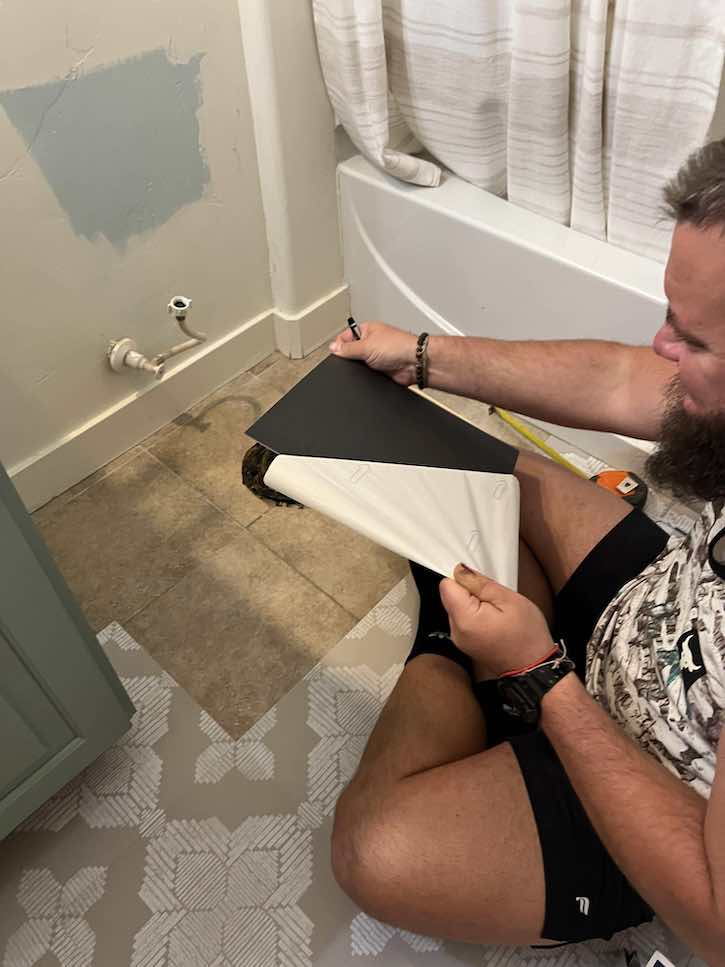
Kevin cut the tiles to size with a sharp blade, and the installation was quick and easy. The new tile design is stunning and adds so much character to the space.

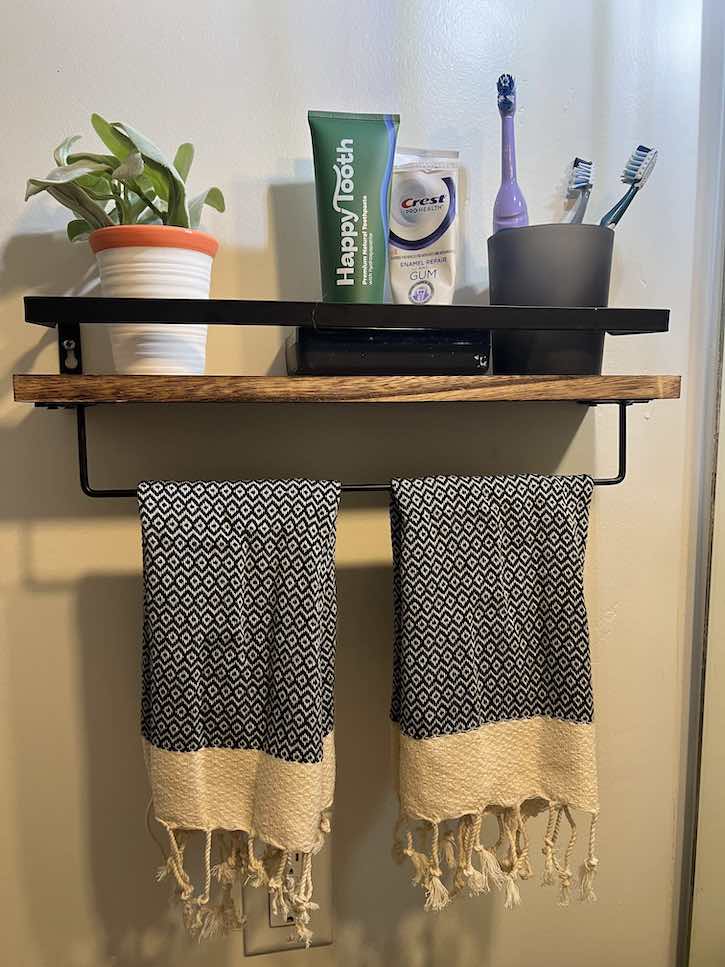
4. Adding Open Shelving
Emily found sleek, modern shelves on Amazon that perfectly fit the wall beside the sink. She assembled and installed them, adding both storage and decor to the room. Now, there’s space for everyday essentials and decorative touches!
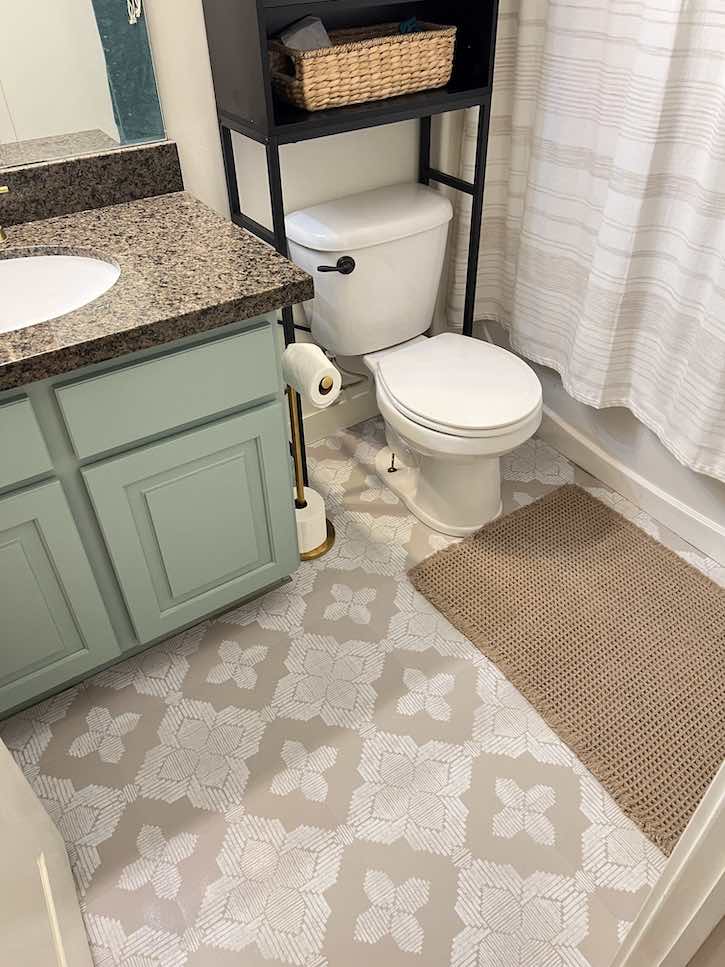
5. Stylish Above-the-Toilet Storage
The black and tan caned storage piece we chose matches the one in our inspiration photo. It provides much-needed storage while serving as a focal point in the room. The contrast between the black frame and tan caning is simply gorgeous.
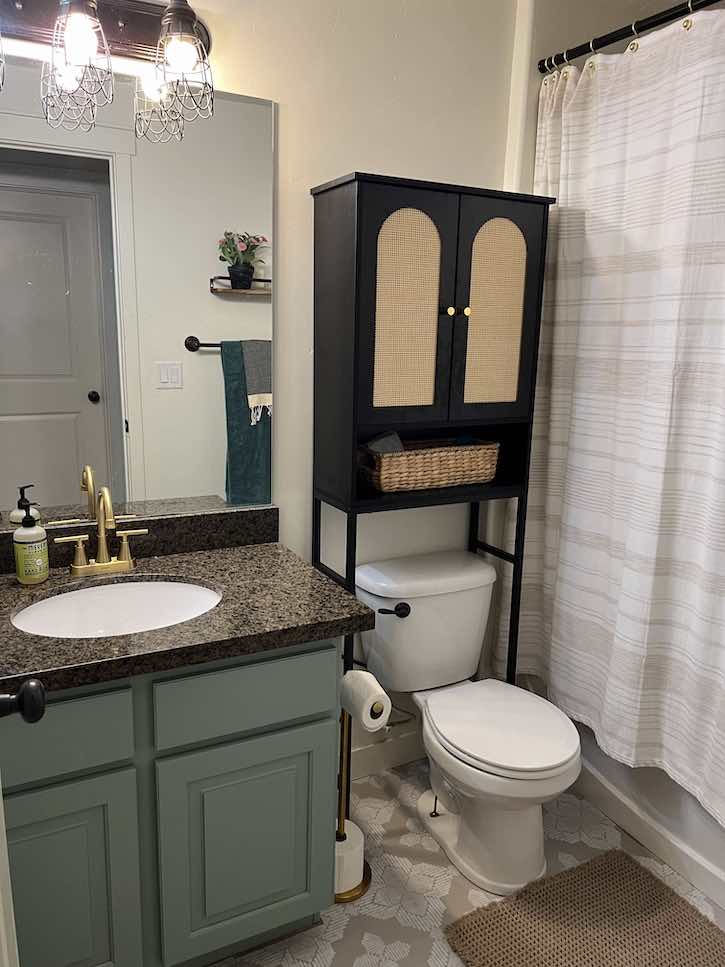
6. Finishing Touches
The little details truly brought this makeover together:
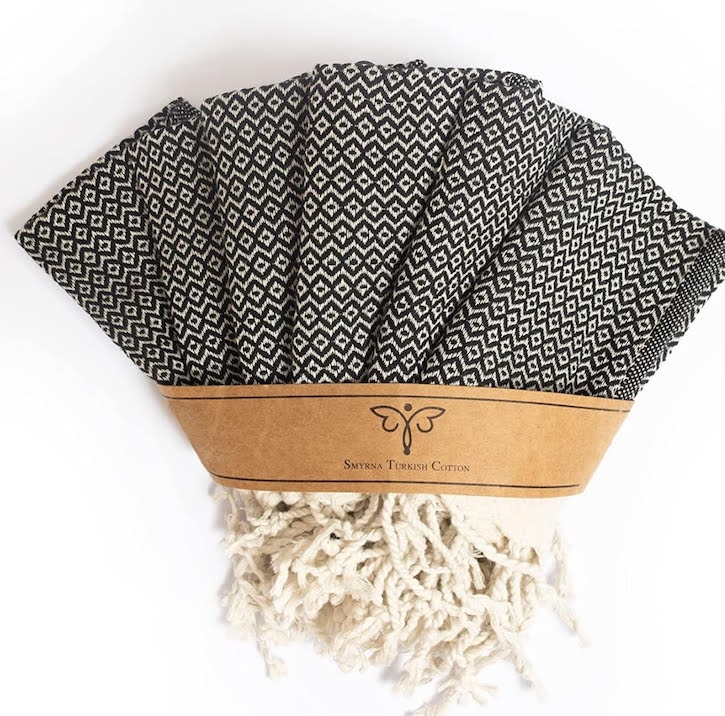
- A textured white and tan shower curtain with a sleek black curtain rod
- A soft tan rug that feels great underfoot
- A new toilet paper holder
- Gold knobs (soon to be installed) for the cabinet

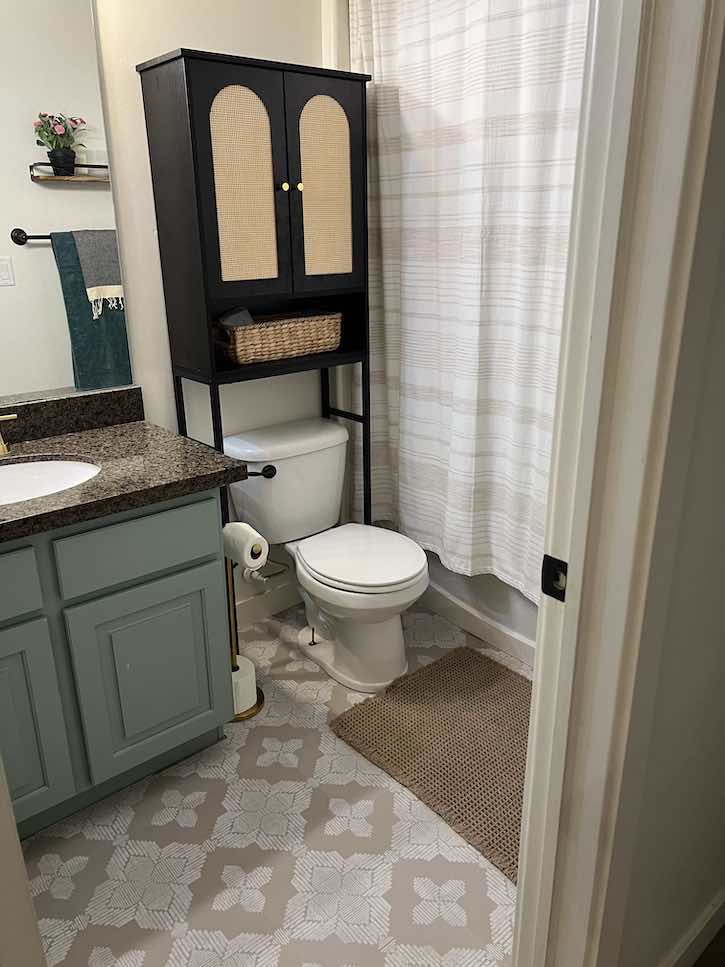
The Final Look of the Basement Bathroom Budget Makeover
What a transformation! This small bathroom now feels fresh, stylish, and functional. The green cabinet and gold faucet add a touch of elegance, while the open shelving and storage piece above the toilet provide practical solutions. The peel-and-stick tile completely changed the look of the floor, making it feel like a whole new space.
Budget-Friendly and Beautiful
The best part? This makeover didn’t cost a fortune. By using leftover paint, peel-and-stick tiles, and a few affordable accessories, Emily and Kevin created a stunning space without major renovations. It’s proof that you don’t need to spend a lot to make a big impact.

Your Turn
Have you tackled a bathroom makeover or any other home renovation projects recently? I’d love to hear your tips and ideas in the comments below. Let’s inspire each other to create beautiful spaces on a budget!
Shop Items from this Makeover

I love your bathroom makeover! I love the color of your lower cabinet! Great job! Hugs,
Thank you so much Sandi 🙂 My daughter and son in law really did an amazing job didn’t they 🙂
I love the black and wicker shelf!
Jennifer, Isn’t it so cute! It totally makes the the bathroom look high end for little dollars. Plus the fact that it provides lots more storage too! Win win!
Thanks so much for stopping by and saying hi.
Karin
Wow! Your bathroom makeover turned out so good! I finally got around to painting my bathroom cabinets, but now I’m wondering about the flooring. I’ve been considering doing the peel and stick tile as well, but I’m a little nervous how well they will hold up in a high traffic area. Do you have a lot of experience using peel and stick flooring and if so, how have they held up over time? Thanks for sharing!
This was a first time for us and so far it has held up well with 4 people using it consistently. If you are putting it over tile that has deep grout lines it could cause an issue with lifting. There is something you can do fill the grout lines to avoid gap like using wall epoxy. So far we have not had any issues.
Karin
Please don’t use peel and stick on floors!! Can’t clean without damage over short time period. Worse that carpet in the bathroom! Go to Restore or Goodwill is looking for a deal on floor tile.
We are really enjoying our peel and stick tiles. Maybe it depends on the type you are using? Good idea to go to Restore or Goodwill if you are going to re tile your floors.
Really pretty, love the green!
Thank you it really turned out so nice! The green is such a nice change for the bathroom cabinet. Plus I just love the the addition of the brass faucet. I can’t wait until the brass knobs are on the doors. It just added a little sparkle. Thank you for leaving such a nice comment 🙂
Hugs, Karin
Wow! That turned out great. I love how this remodel didn’t break the bank either.
Isn’t that just the best to do a makeover that doesn’t break the bank and to have it turn out so nice! I was thrilled with all the work my kids did.
Hugs, Karin