Our kitchen table and chairs were in serious need of a makeover.
We originally refinished this set about 15 years ago, and I actually shared the original dining room chair makeover tutorial here on Karins Kottage way back then.
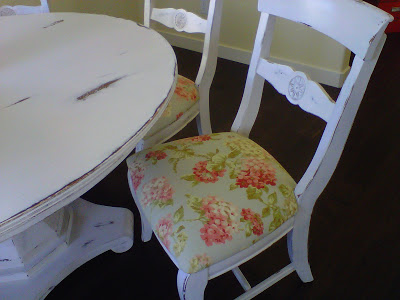
I have to say, 15 years isn’t too bad for a painted table and chairs that get used all the time!
But after years of family dinners, parties, grandkids, spills and everyday life, they were definitely showing their age.
And then there was the graffiti. 😂
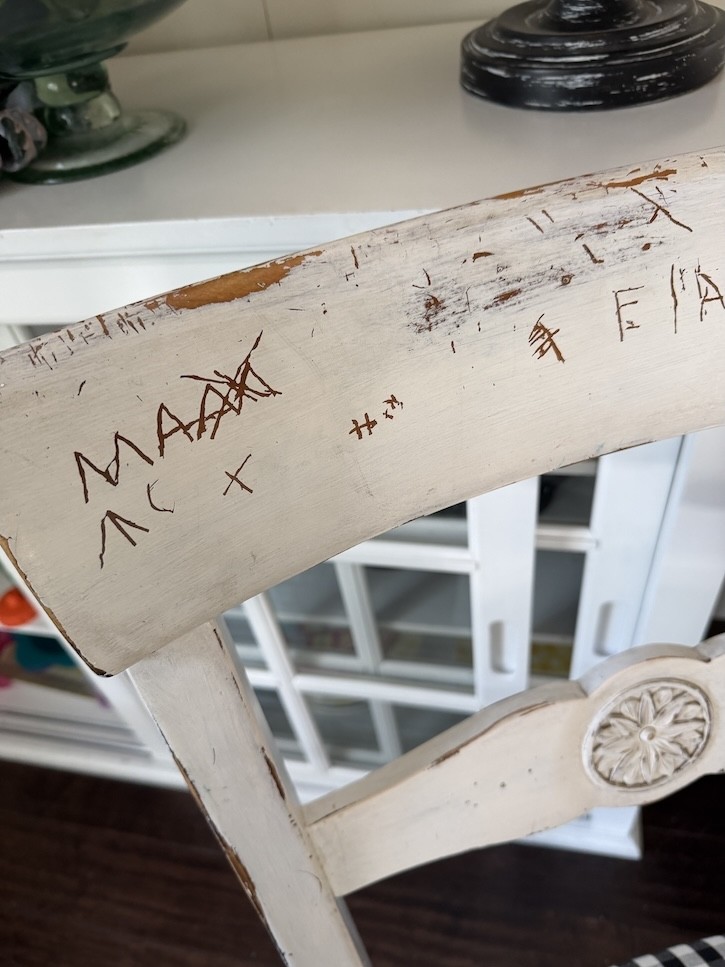
When Your Grandkids Leave Their Mark—Literally
One of my darling grandkids decided to scratch their name right into the back of one of my chairs.
Actually, there may have been a little more than one budding artist involved!
My hubby wanted to leave the “graffiti” because he thought it was cute and part of the history of our family.
I love those grandkids to pieces, but nope. 😂
After all these years, these chairs needed a fresh start.
The table wasn’t looking much better. The top had scratches, worn spots, chips and marks everywhere. It had served us well, but it was definitely time for Kitchen Table Makeover 2.0!
Choosing Black and White Checked Fabric for the Chairs
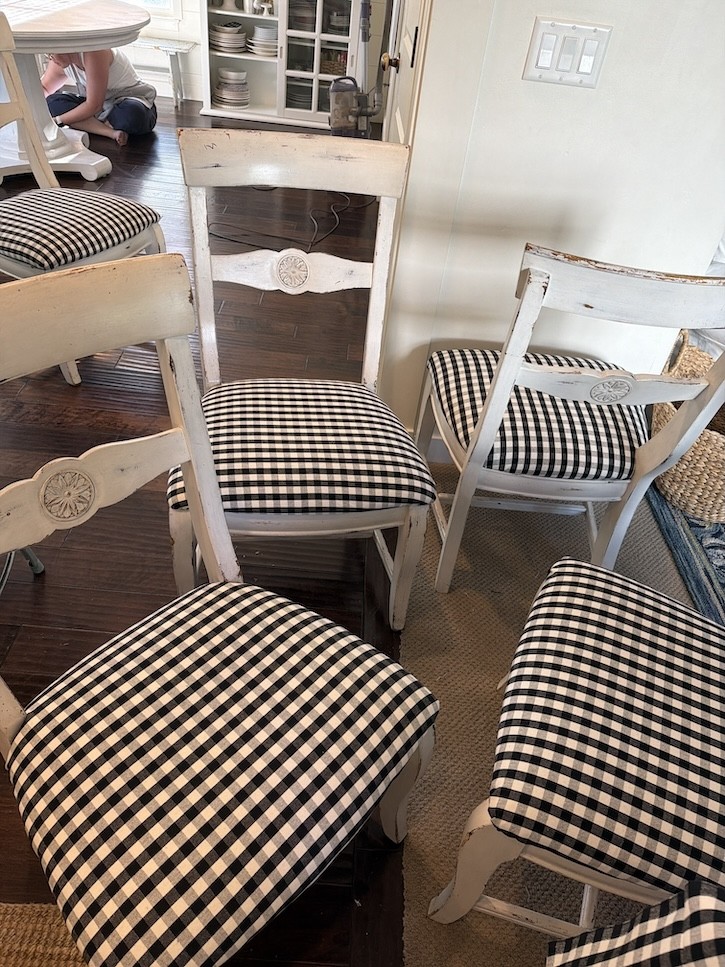
I found this classic black and white checked fabric at IKEA and knew immediately that I wanted to use it on the chair seats.
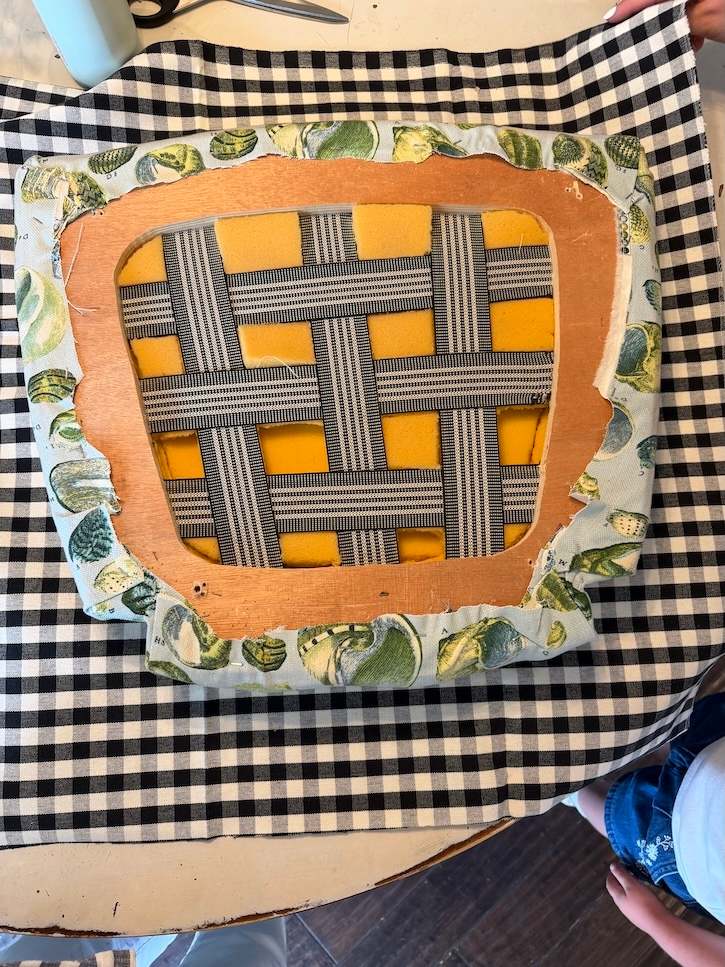
Black and white checks have such a timeless cottage feel, and I love how they look with white painted furniture. They’re fun without being too trendy, which is important to me when I’m putting this much work into a project.
Recovering dining chair seats is also surprisingly easy. If you’ve never upholstered anything before, this is a great beginner project.
How to Recover Dining Chair Seats
Our chair cushions were still in good shape underneath, so there was no reason to tear everything apart and start over.
We simply covered the existing upholstery with our new fabric. The old fabric underneath actually gave the seats a little more body and helped the new fabric feel nice and crisp.
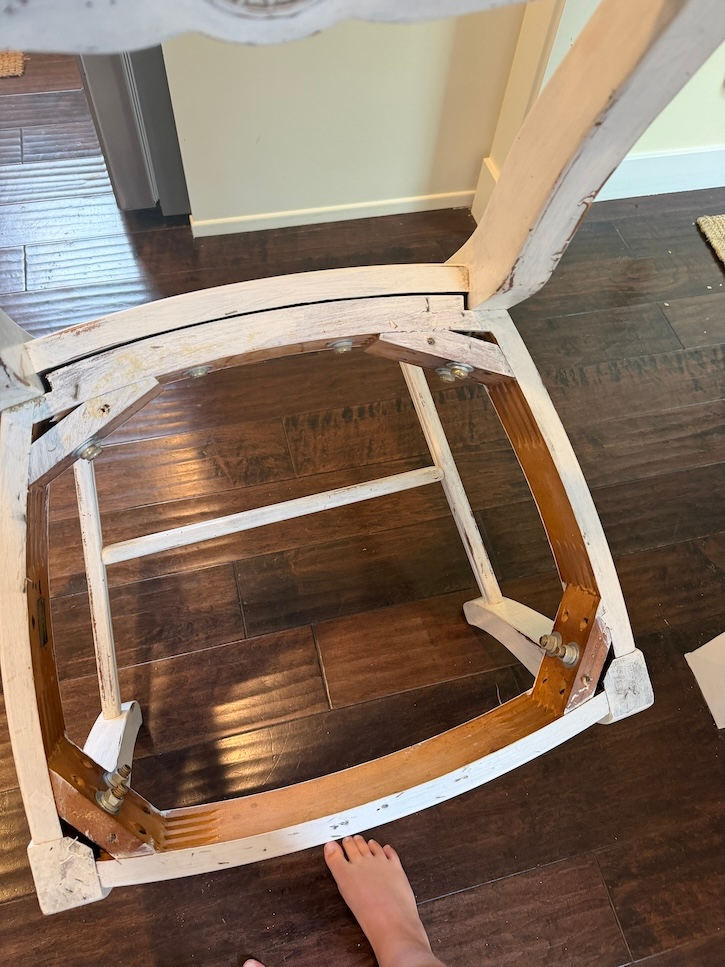
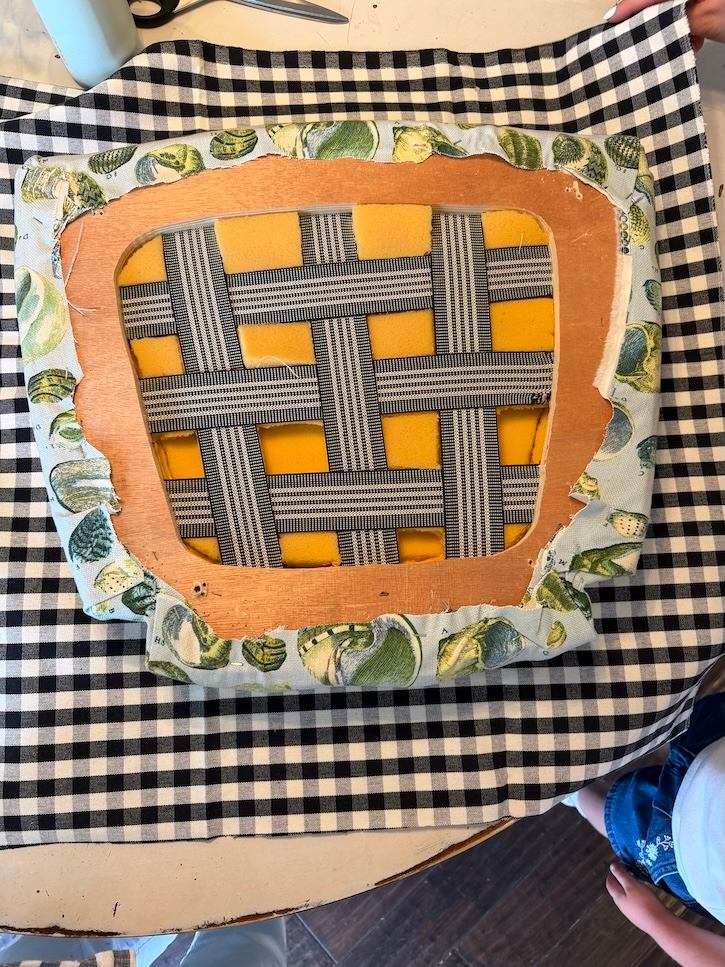
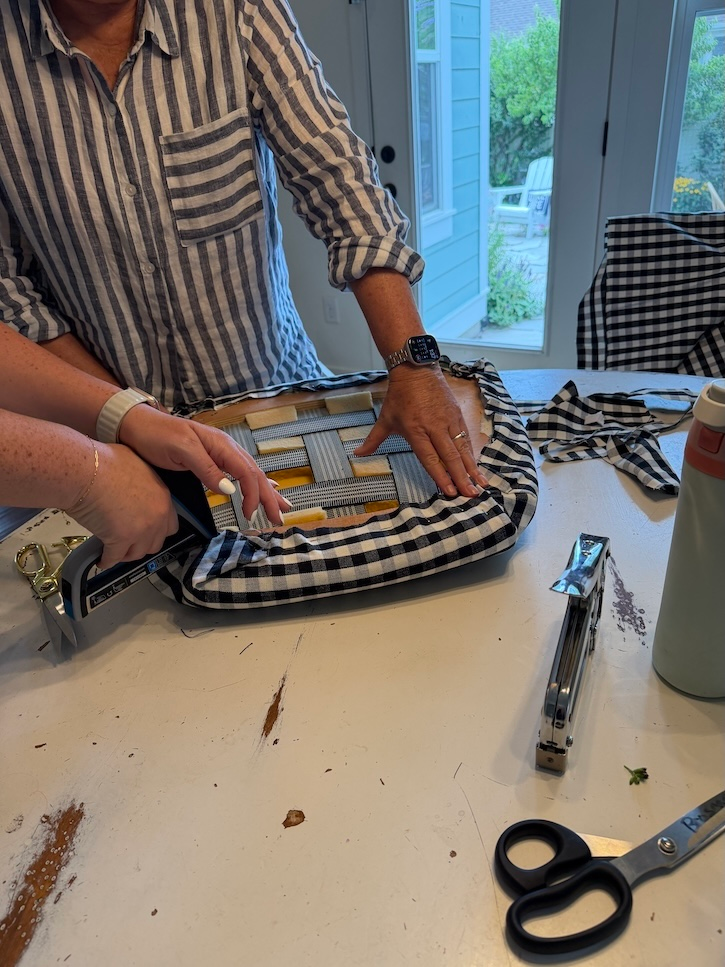
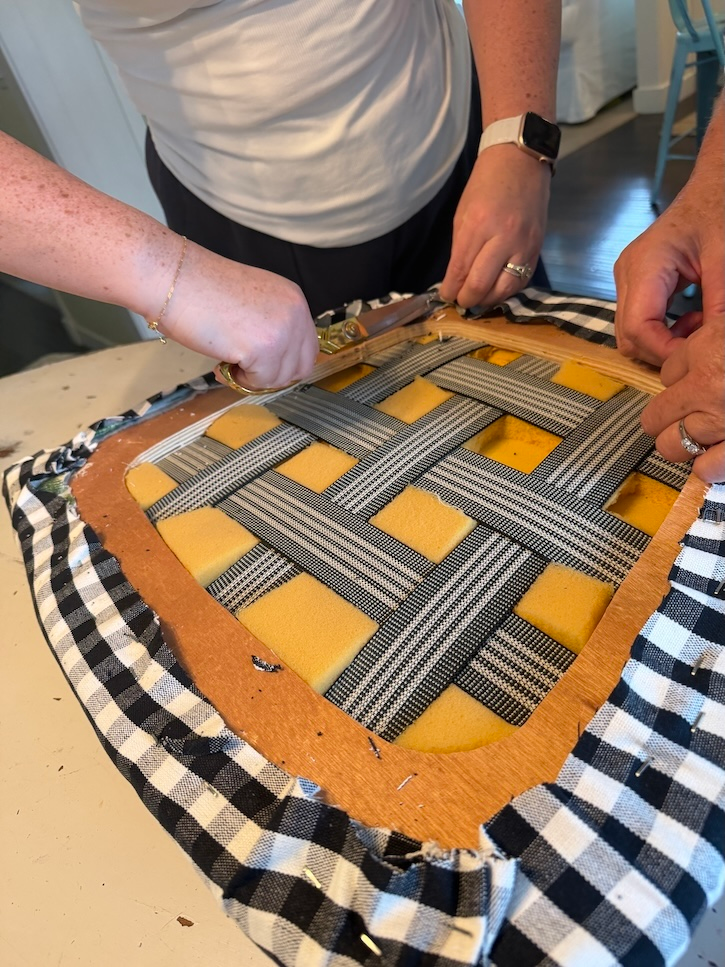
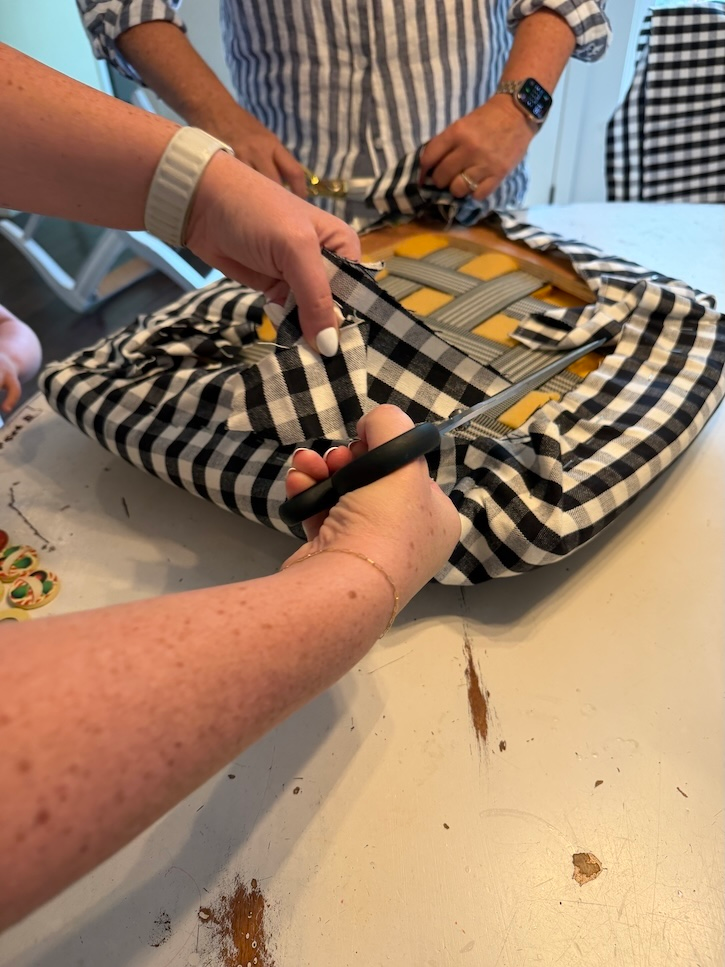
Here’s the basic process we used:
- Remove the chair seat. Turn your chair over and locate the screws holding the seat to the frame. Remove the screws and lift out the seat.
- Lay out your new fabric. Place the chair cushion upside down on the wrong side of your fabric. Make sure you have several inches of extra fabric around every side so there’s enough to wrap underneath.
- Pay attention to your pattern. This is especially important when using checks or stripes! Before cutting, make sure the pattern is running straight across the seat.
- Cut your fabric. Cut around the seat, leaving enough extra fabric to wrap comfortably around the edges and staple to the underside.
- Begin stapling. Start in the center of one side and add a few staples. Then move to the opposite side, pull the fabric taut and staple that side.
- Continue around the seat. Alternate sides as you go, pulling the fabric snug and smoothing it with your hands. You want it tight enough to eliminate wrinkles but not so tight that your checks become distorted.
- Tackle the corners last. Fold and tuck the fabric neatly around each corner, almost like wrapping a present. Play around with the folds until the fabric looks smooth from the top, then staple everything securely underneath.
- Trim the excess fabric. Once you’re happy with the seat, trim off any bulky excess fabric underneath.
Then simply screw the finished seat back onto the chair.
Look at the difference!
The black and white check instantly made these old chairs look fresh again.
Prepping Our Table and Chairs for Chalk Paint
One reason I like using chalk paint on furniture is that there usually isn’t a lot of prep involved.
We started by giving the table and chairs a really good cleaning. After 15 years of use, I definitely wanted to remove any dirt, grease and grime before painting.
We did not sand all of the chairs before painting them.
The tabletop was another story.
Because it had so much wear and tear and would continue to get a lot of use, we decided to give the top a light sanding first.
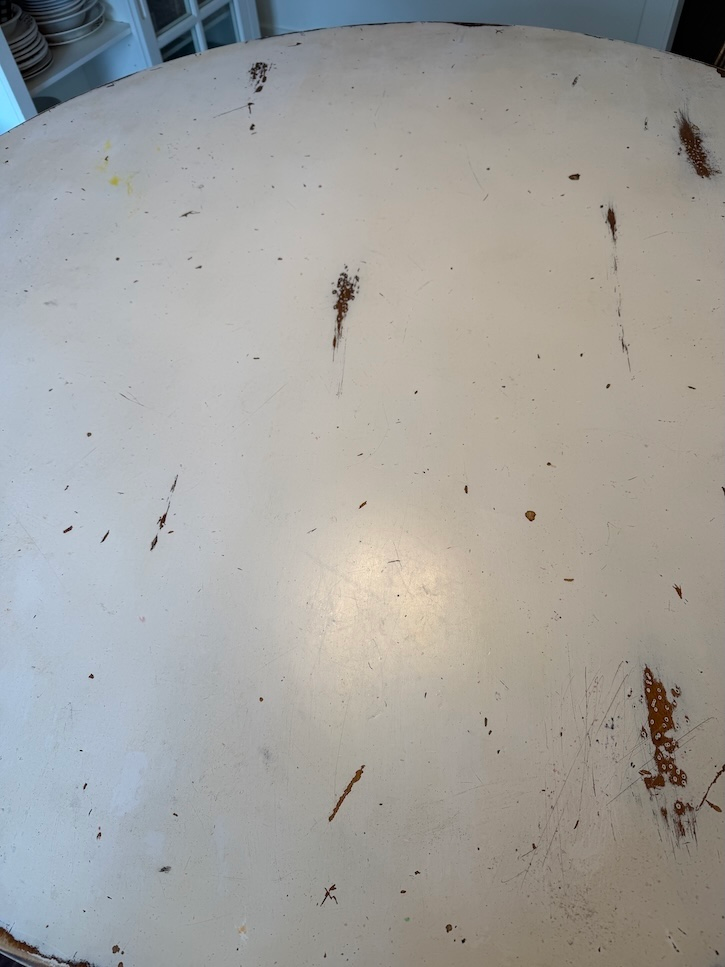
We weren’t trying to sand it all the way down to the original natural wood. We just wanted to smooth out some of the damage and rough up the existing finish enough to give our chalk paint a good surface to grab onto.
Painting the Table and Chairs
For this project we used Valspar Chalky Finish Paint.
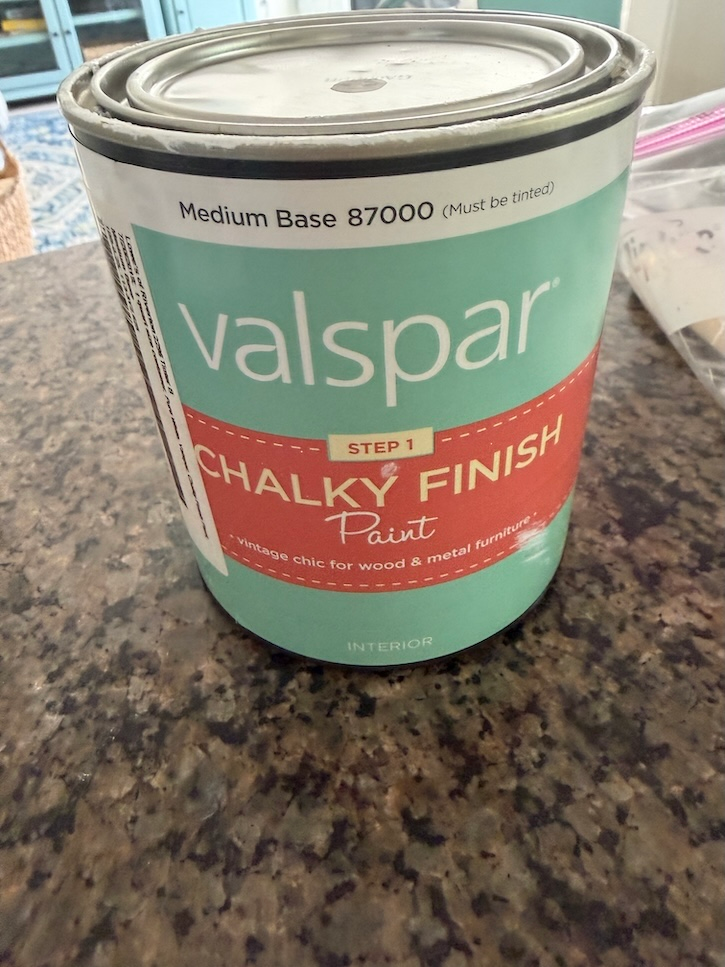
I have used Annie Sloan Chalk Paint in the past, and I have to say that I personally prefer it.
I was trying to save a little money this time around, but looking back, I wish I had spent the extra money for Annie Sloan. In my experience, I prefer the way Annie Sloan paint applies and finishes.
That being said, we went ahead with the Valspar and gave the furniture a couple of coats, allowing it to dry between coats.
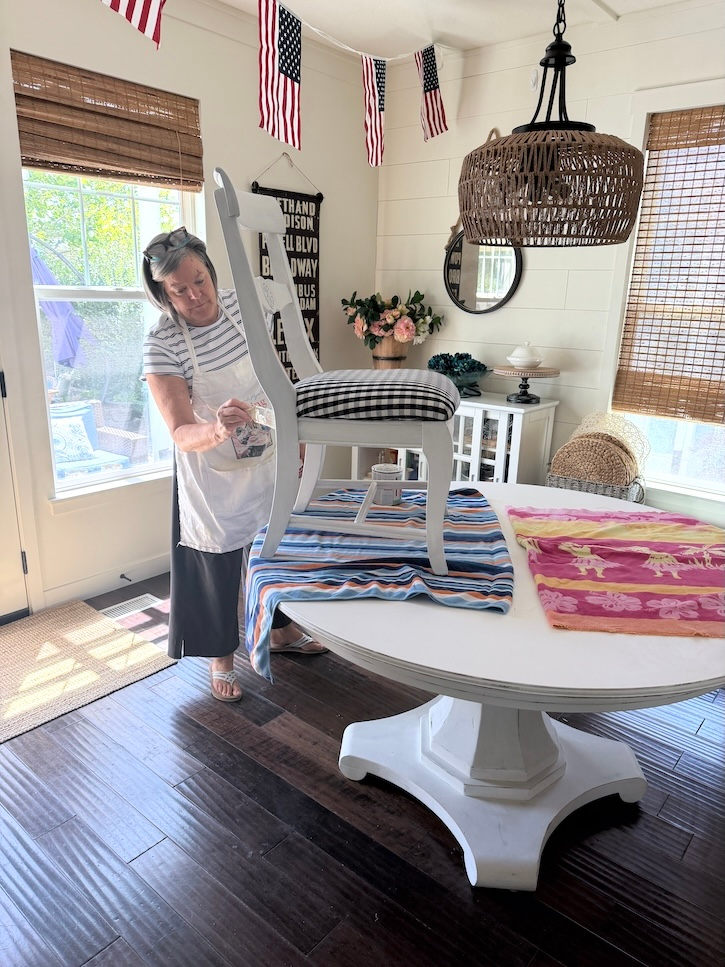
And yes, painting all those chair spindles, legs and little details takes a while!
Put on some good music or a movie and settle in. 😉
Sanding Between Coats Made a Difference
For the tabletop especially, we wanted a smooth finish rather than a heavy, chalky painted texture.
After a couple of coats of paint, we lightly sanded the surface, painted again and then lightly sanded once more.
This is definitely a project where patience pays off.
Don’t rush the drying, sanding and finishing stages. That tabletop is going to get touched, wiped and used constantly, so taking a little extra time is worth it.
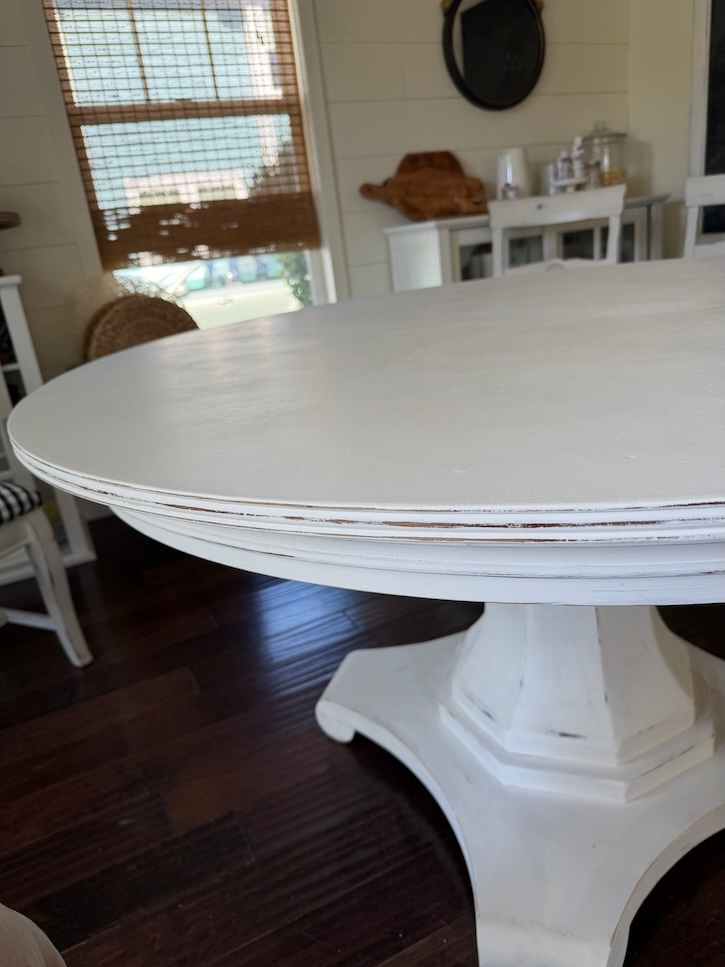
We also allowed some of the darker wood to peek through around the edges and details. I love that slightly distressed look because it gives the table character rather than making it look brand new.
Finishing the Chalk Paint With Annie Sloan Wax
Once we were happy with the paint, we finished everything with Annie Sloan wax.
Waxing chalk paint gives it such a lovely feel. Our finished tabletop feels incredibly smooth and soft to the touch.
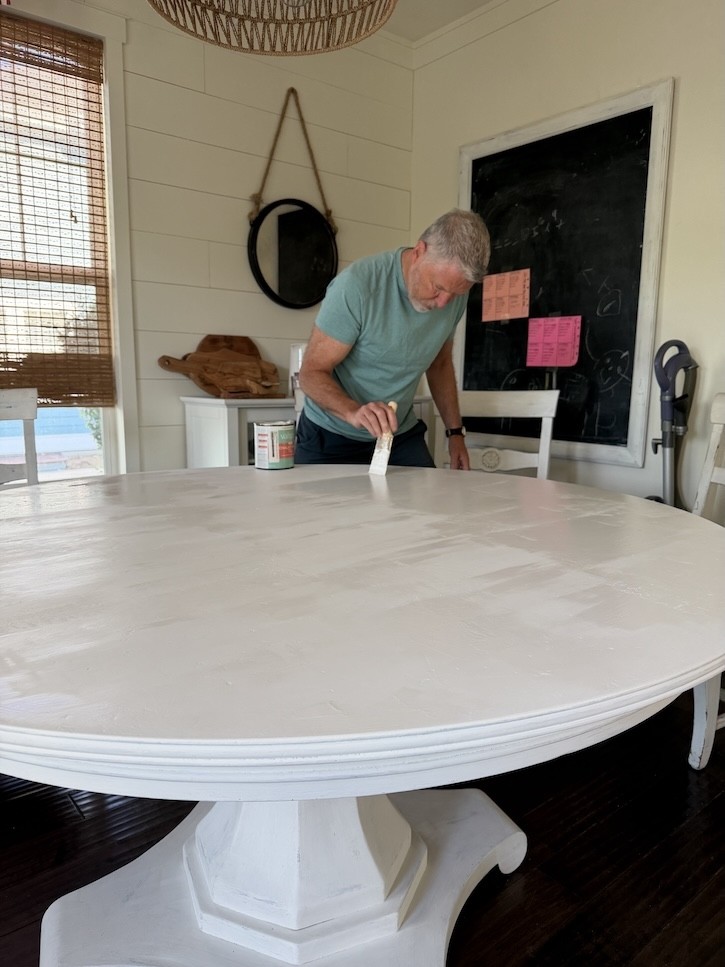
One thing I noticed, however, is that when the light hits the tabletop at certain angles, I can see some swirls from the waxing process.
I’m not sure whether that came from the combination of using Valspar chalk paint with Annie Sloan wax, the way we applied or buffed the wax, or simply because a large flat tabletop shows everything when sunlight hits it.
I don’t want to blame the paint when I don’t know that for sure!
But if I were doing this project again, I would probably go back to using Annie Sloan Chalk Paint simply because I’ve had such good results with it in the past.
Was It Worth Repainting Our Old Kitchen Table?
Absolutely.
I can’t believe how much fresher the whole kitchen feels!
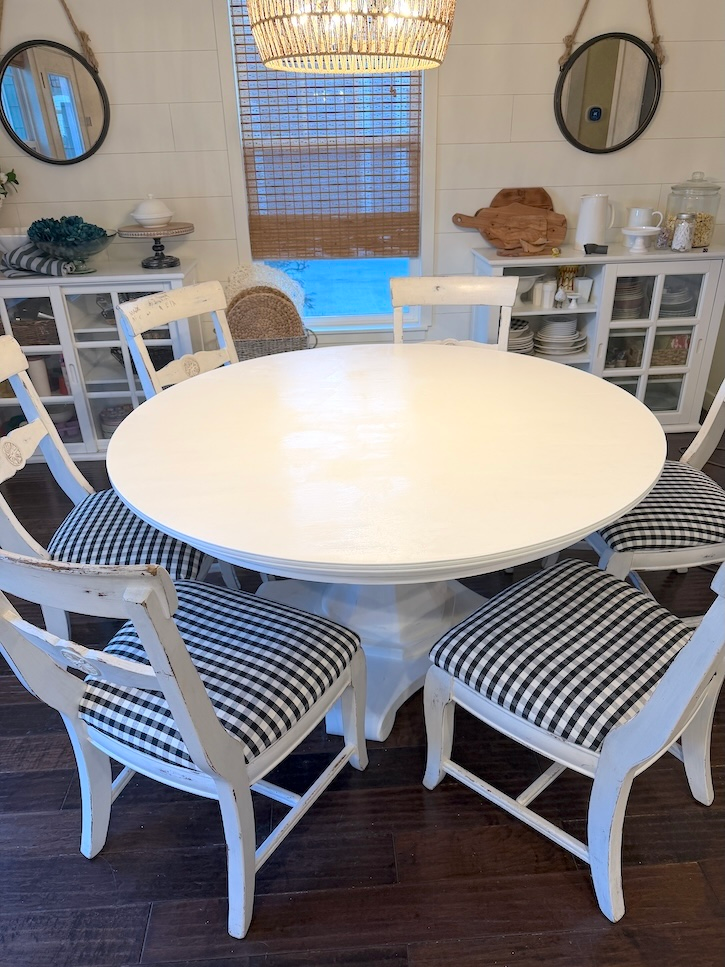
The crisp black and white checked seats against the creamy white chairs are exactly the cottage look I wanted, and the newly painted tabletop looks so much cleaner and brighter.
Is it perfect?
Nope.
But that’s actually one of the things I love about painted furniture. This is a table where our family gathers. Grandkids eat here. We celebrate birthdays and holidays here. Food gets spilled and chairs get dragged around.
And every once in a while, apparently someone carves their name into the furniture. 😂
I’d rather have a beautiful table that we’re not afraid to actually live around than something so precious that everyone is afraid to touch it.
Don’t Give Up on Your Old Furniture
Before getting rid of an old kitchen or dining set, take another look at it.
A few yards of fabric, some paint, a staple gun and a little elbow grease might be all it needs.
Our first makeover lasted about 15 years, so I’d say we definitely got our money’s worth out of this table and chairs.
Now they’re ready for another round of family dinners, holidays and grandkids.
Although this time I may hide all the sharp objects. 😉


What a fun and rewarding project you tackled. Thanks for sharing with the WTJR link-up.
Rena
https://finewhateverblog.com
Thank you Rena! It was a lot of work but totally worth it. Thanks so much for stopping by to say hi.
Hugs,
Karin
You are right on how easy it is to upholster a chair seat. It’s so satisfying, isn’t it? The fabric you chose looks so cute!
It looks really nice and I admire your patience with all the painting!